
modifications > 2024 Model Year Updates
What 2024 model year updates did you install on your GR?
Ken Gushi Motorsports posted a video [-LINK-] in December 2023 entitled "My 2023 Toyota GR Corolla gets Model Year 2024 Updates!" In that video Ken first describes then installs modifications to his GR after receiving a box of parts with some instructions from friends.
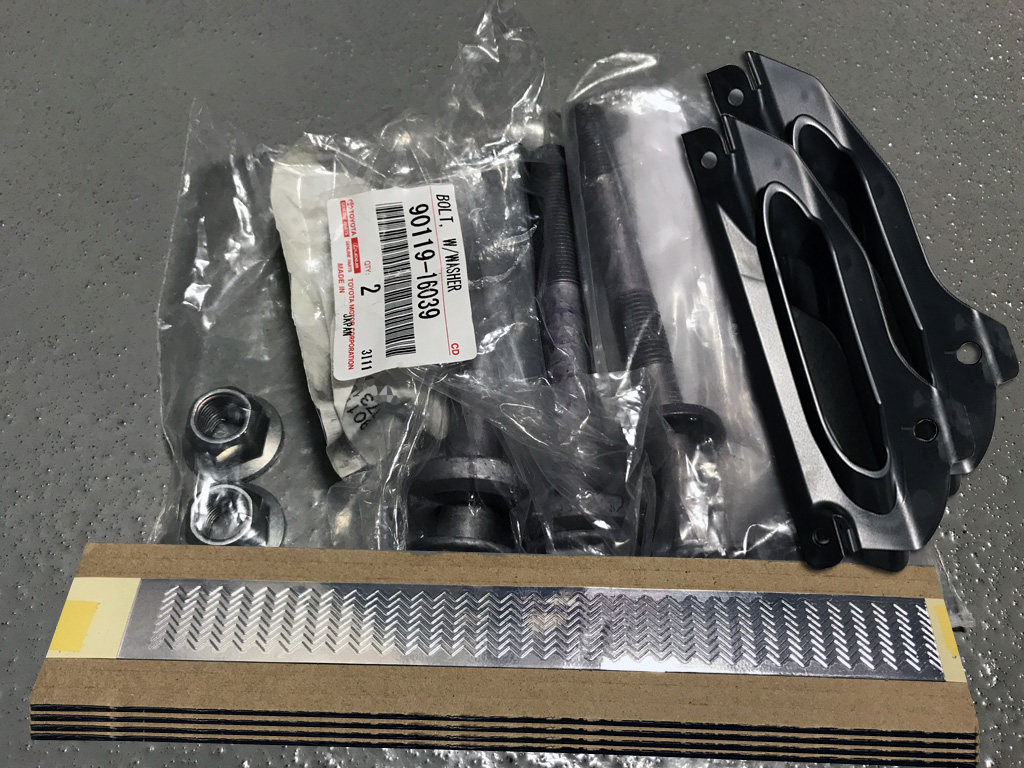
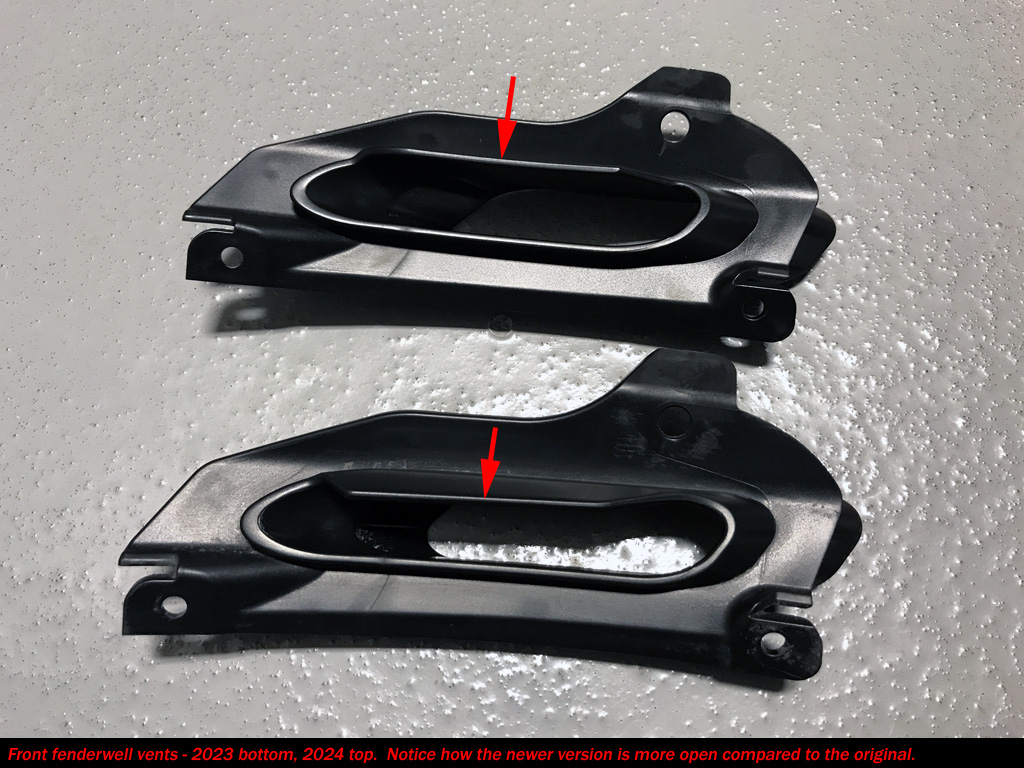
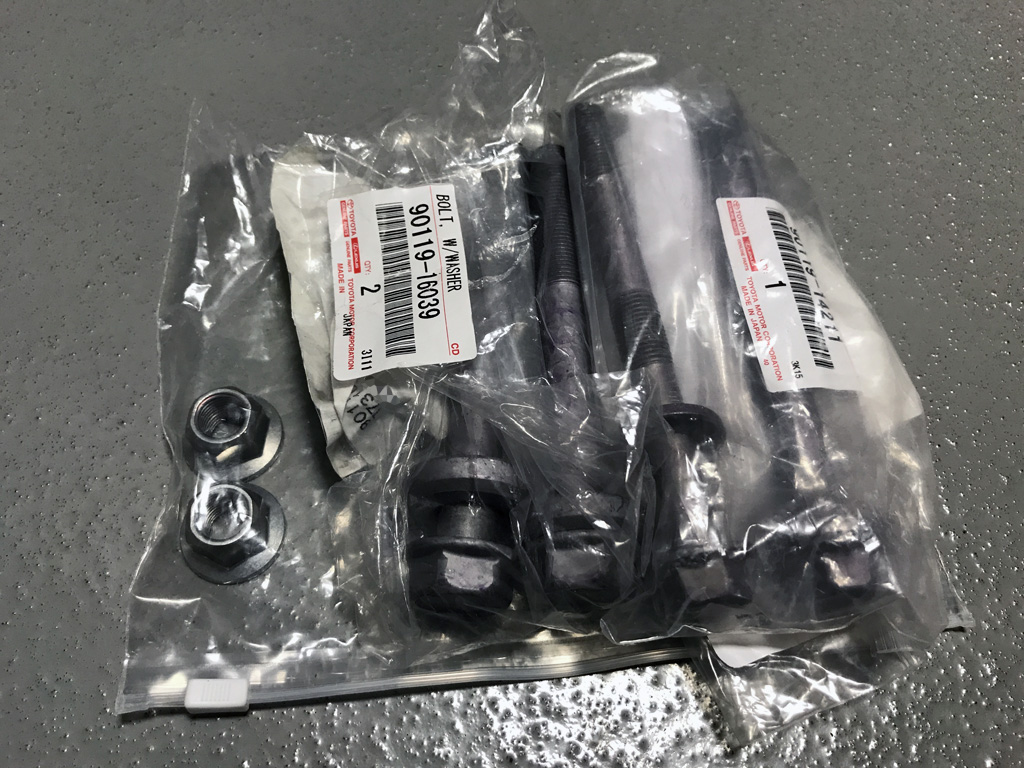
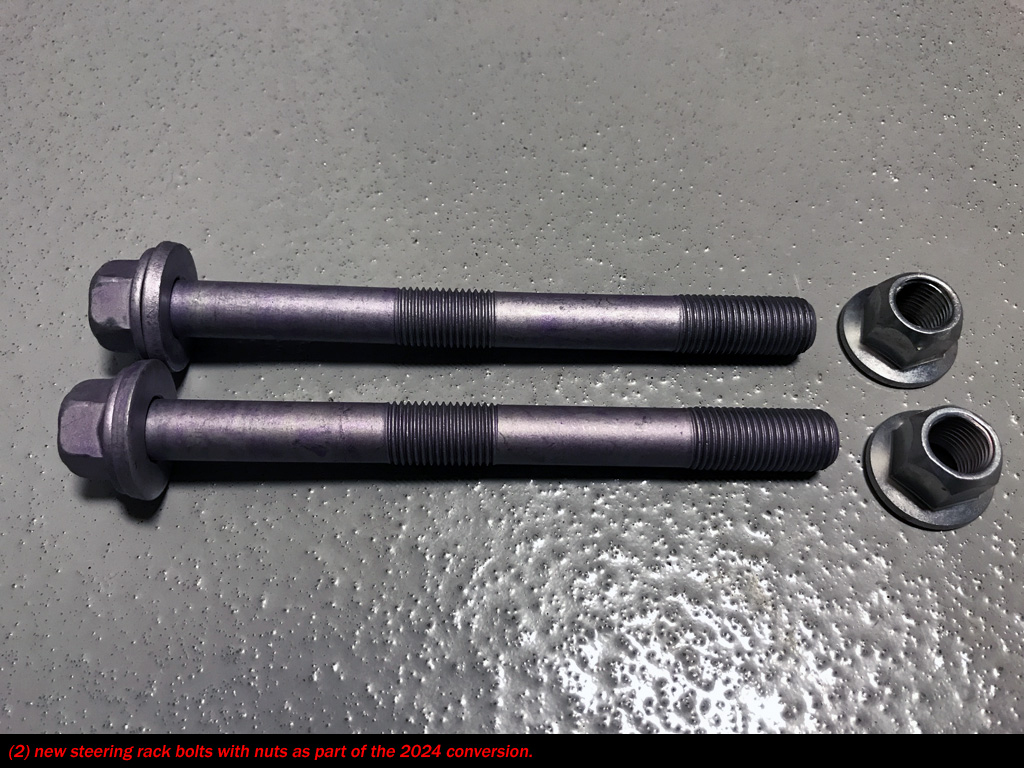
The parts consist of (2) revised front fender well outlet ducts, (2) rear subframe replacement bolts, (2) steering rack replacement bolts with nuts, and (4) pieces of (now infamous) aluminum tape.
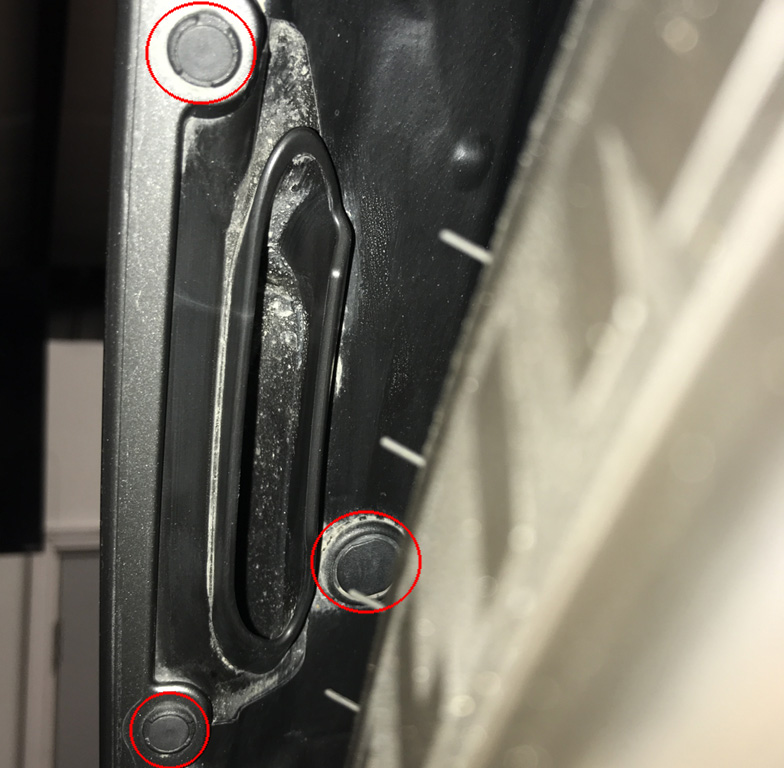
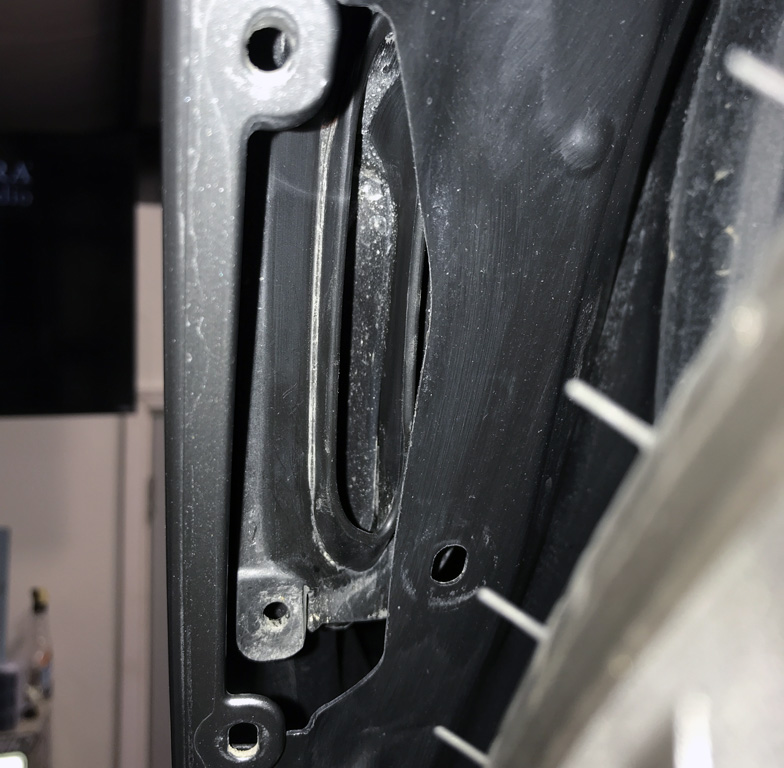
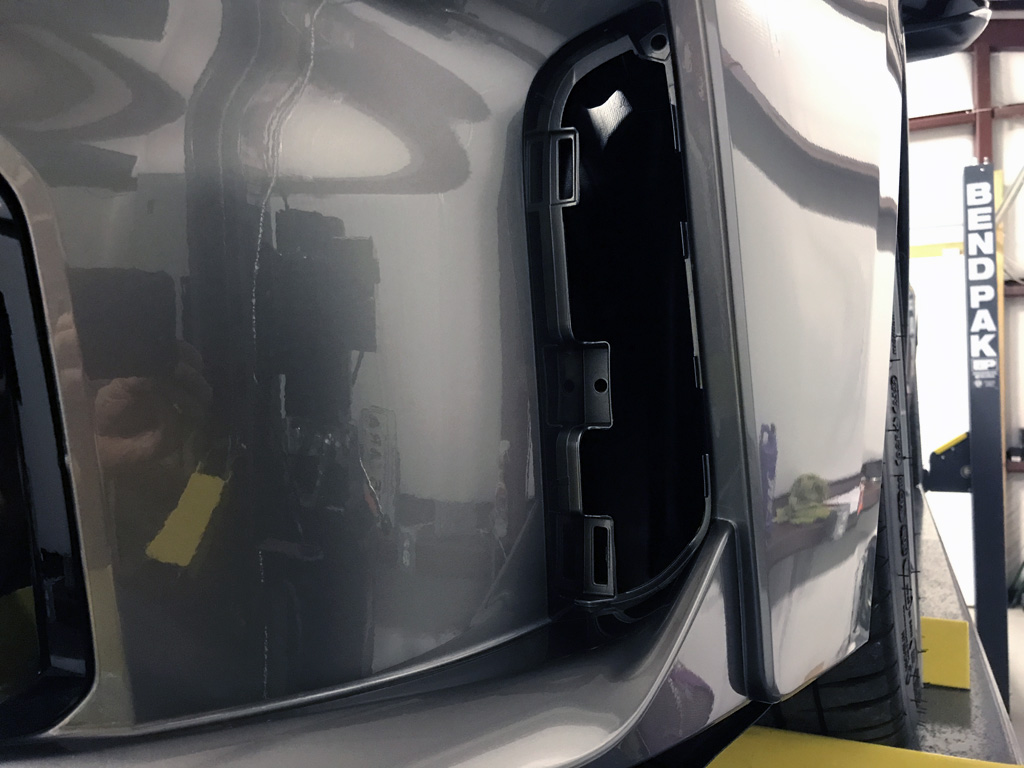
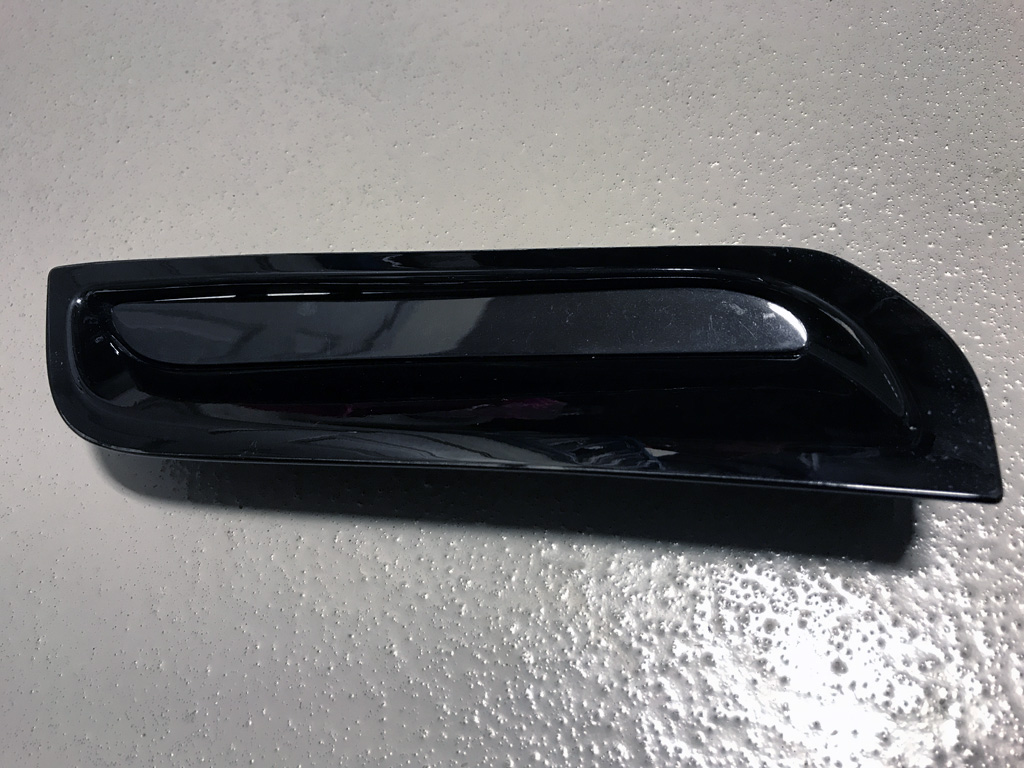
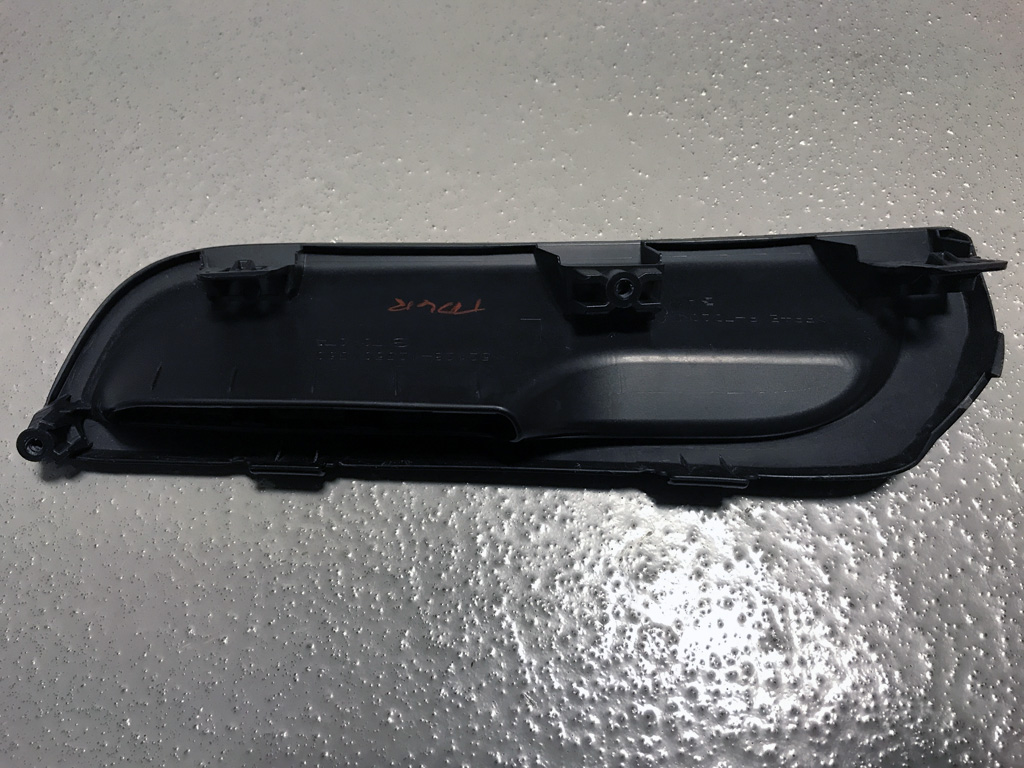
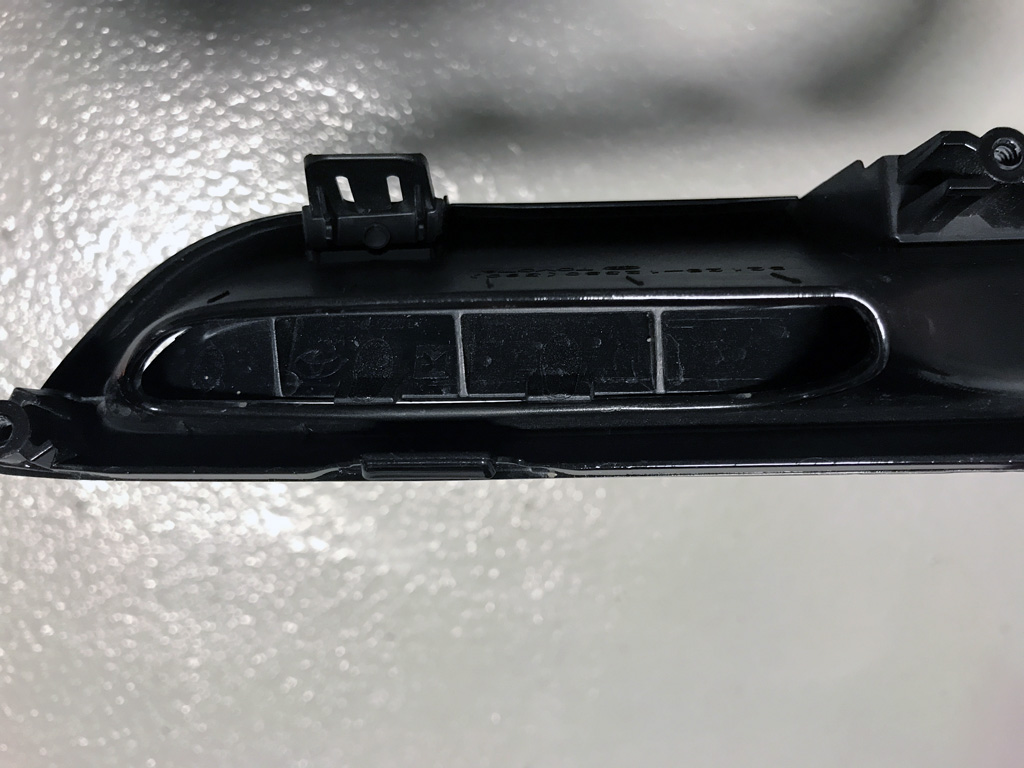
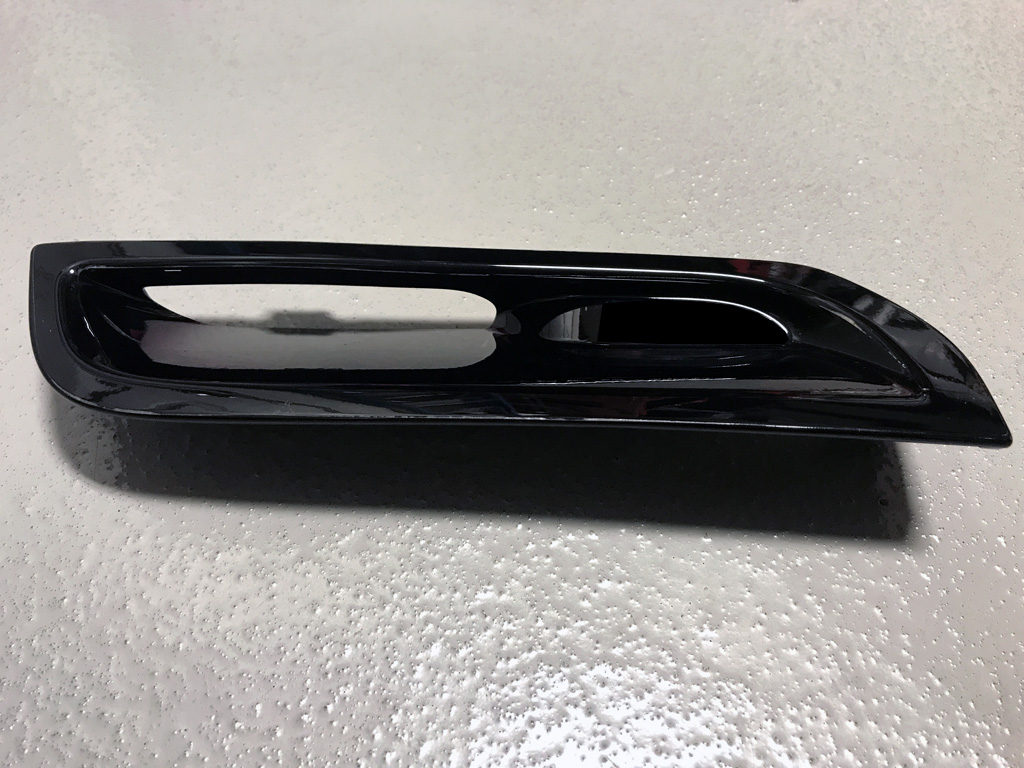
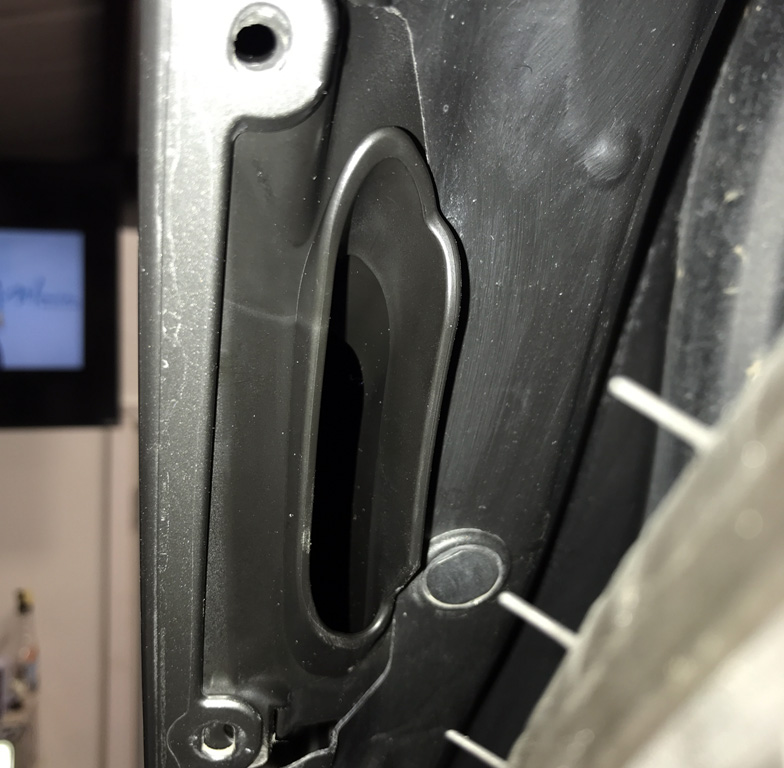
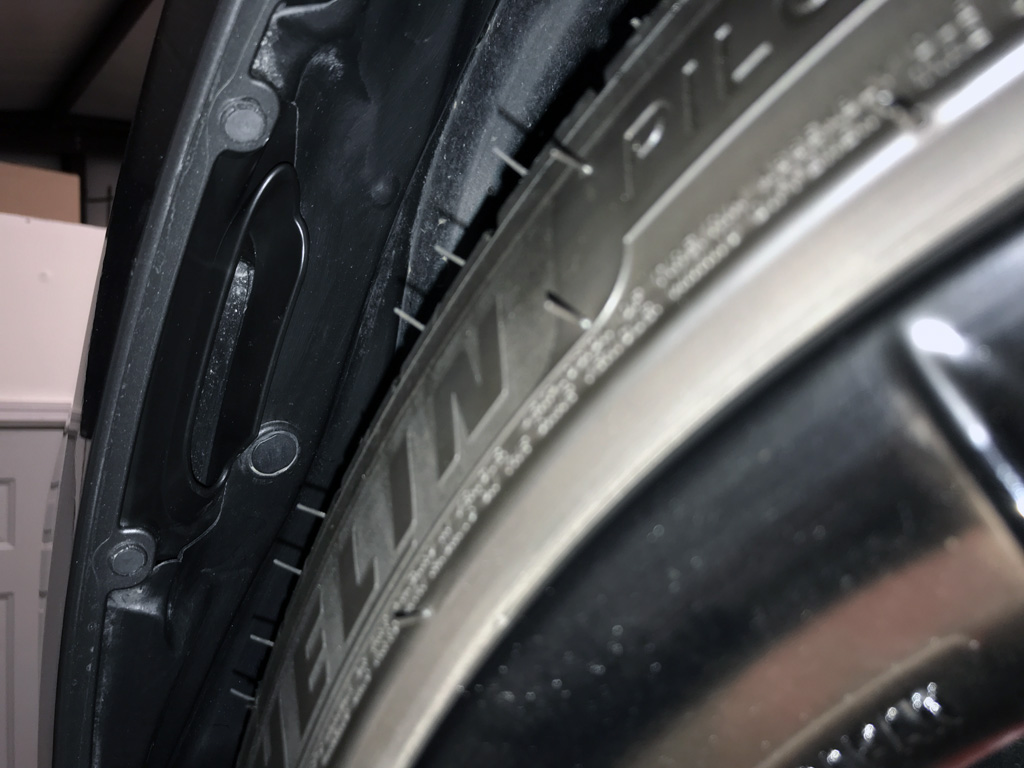
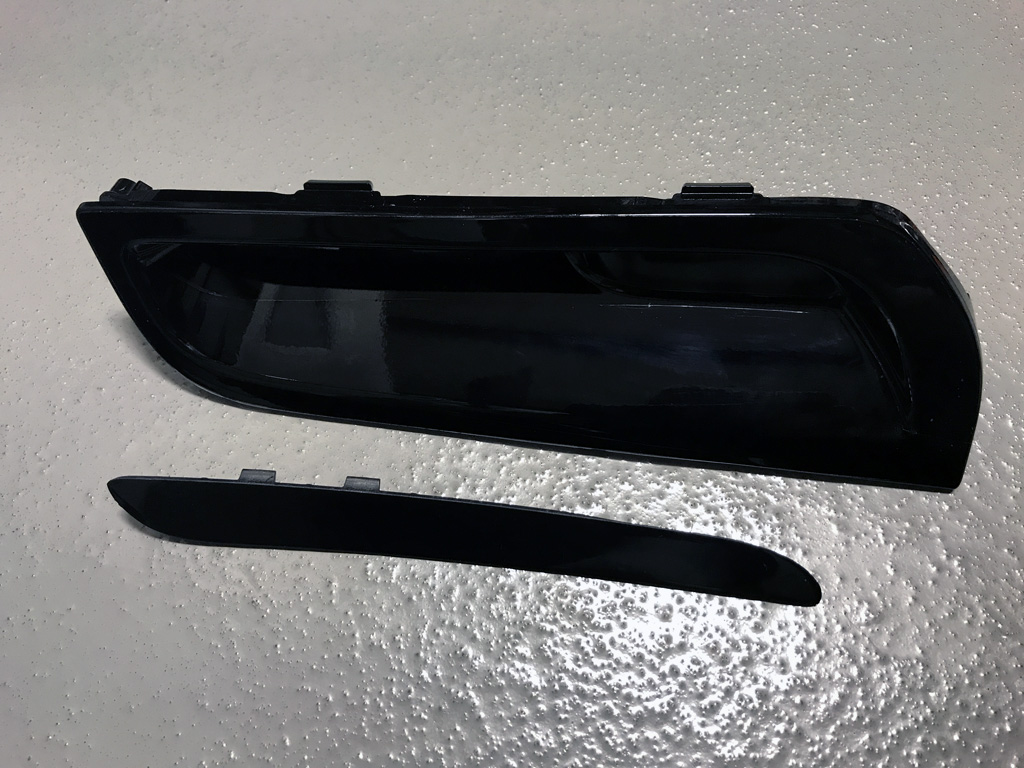
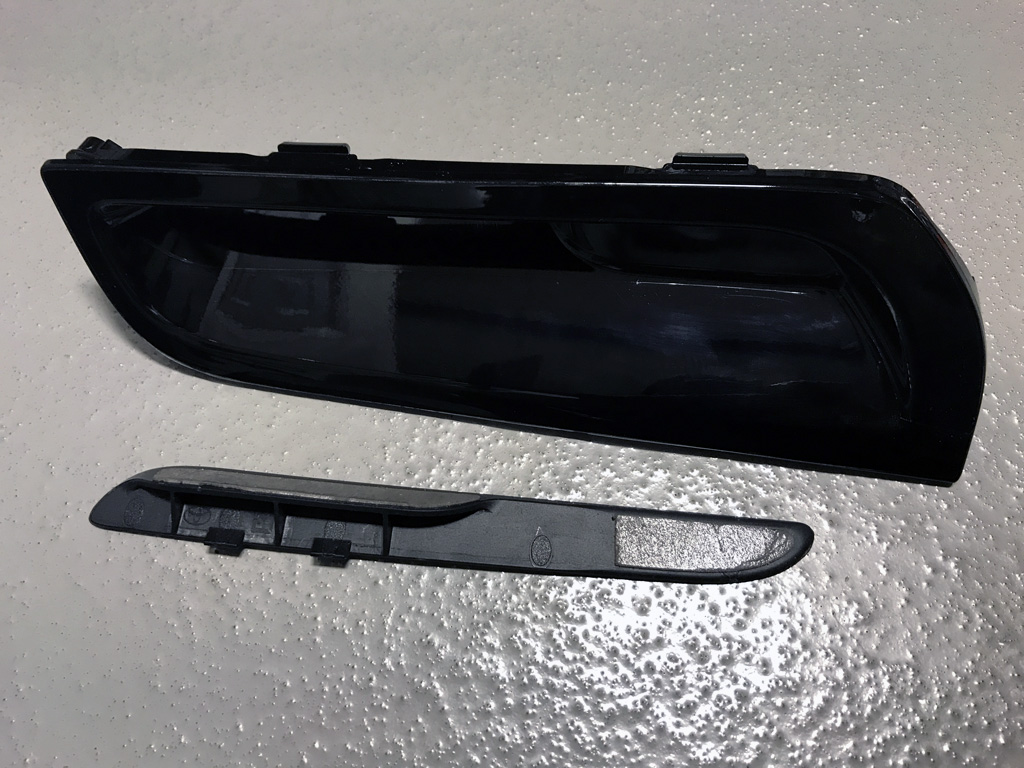
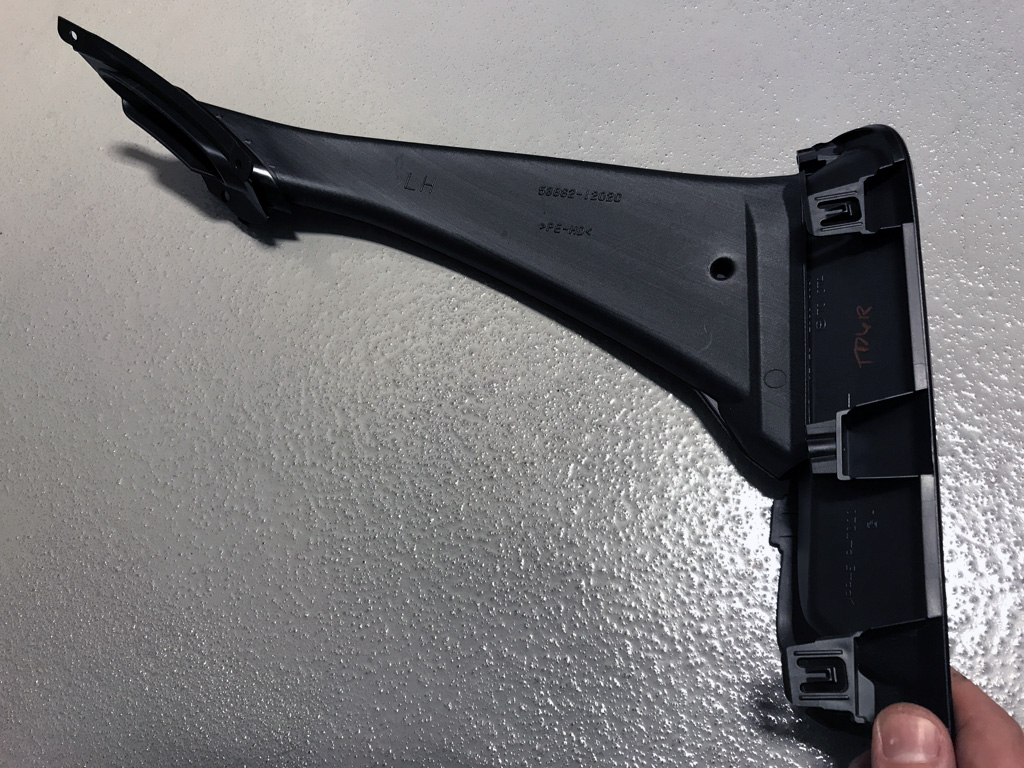
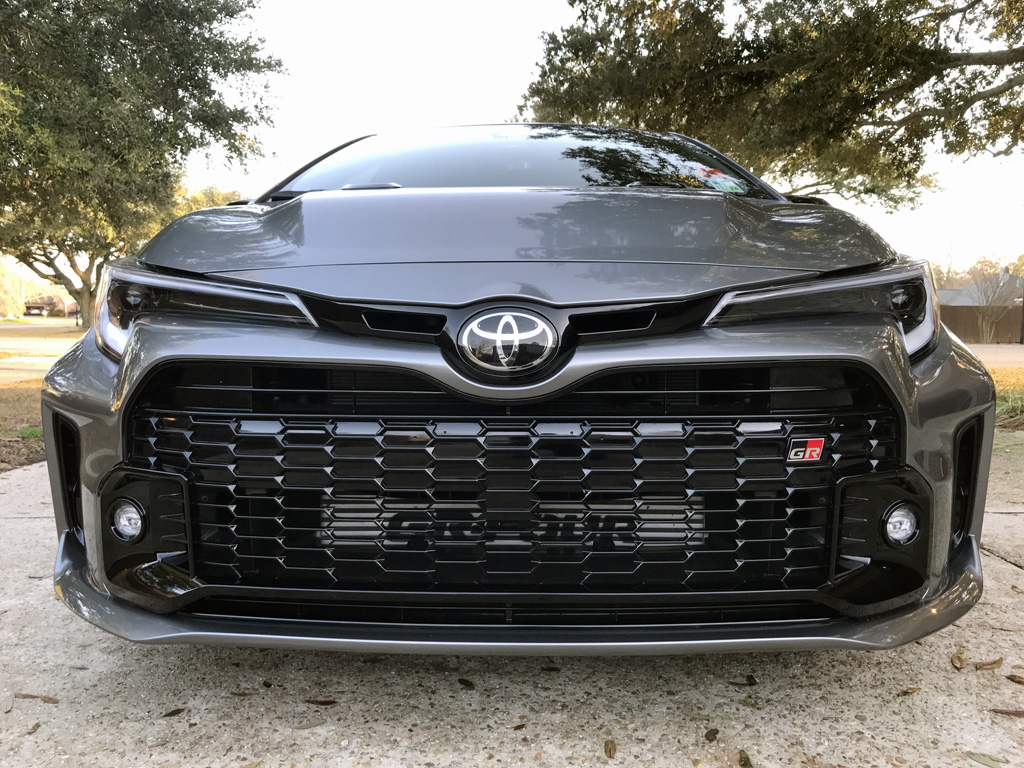
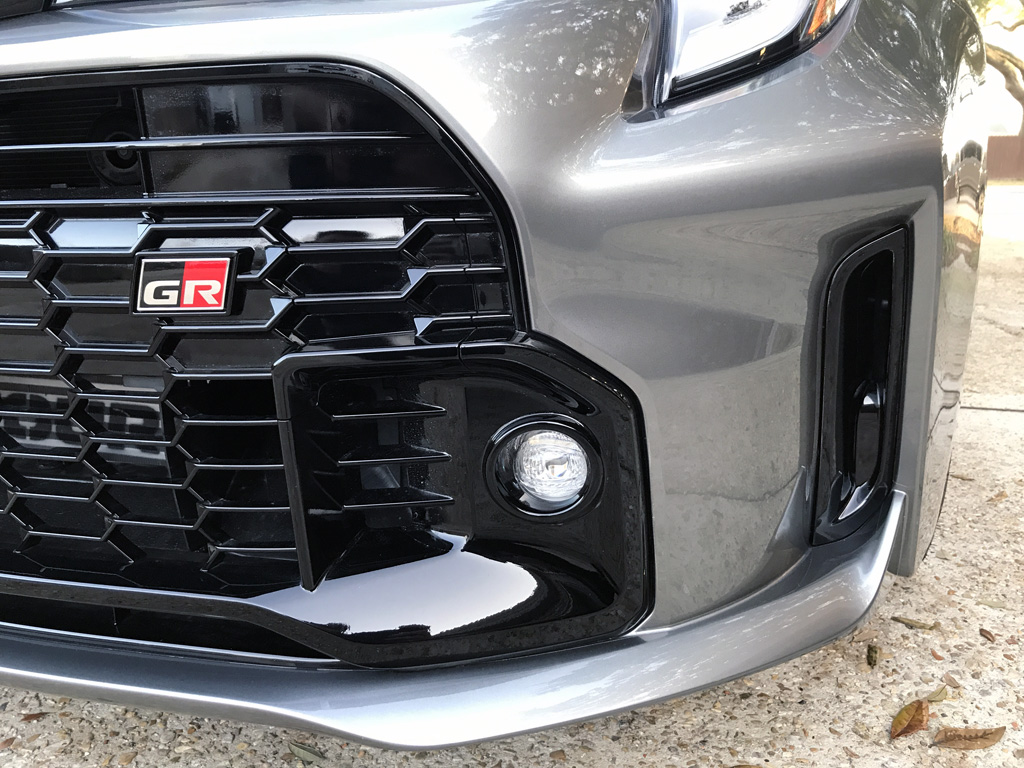
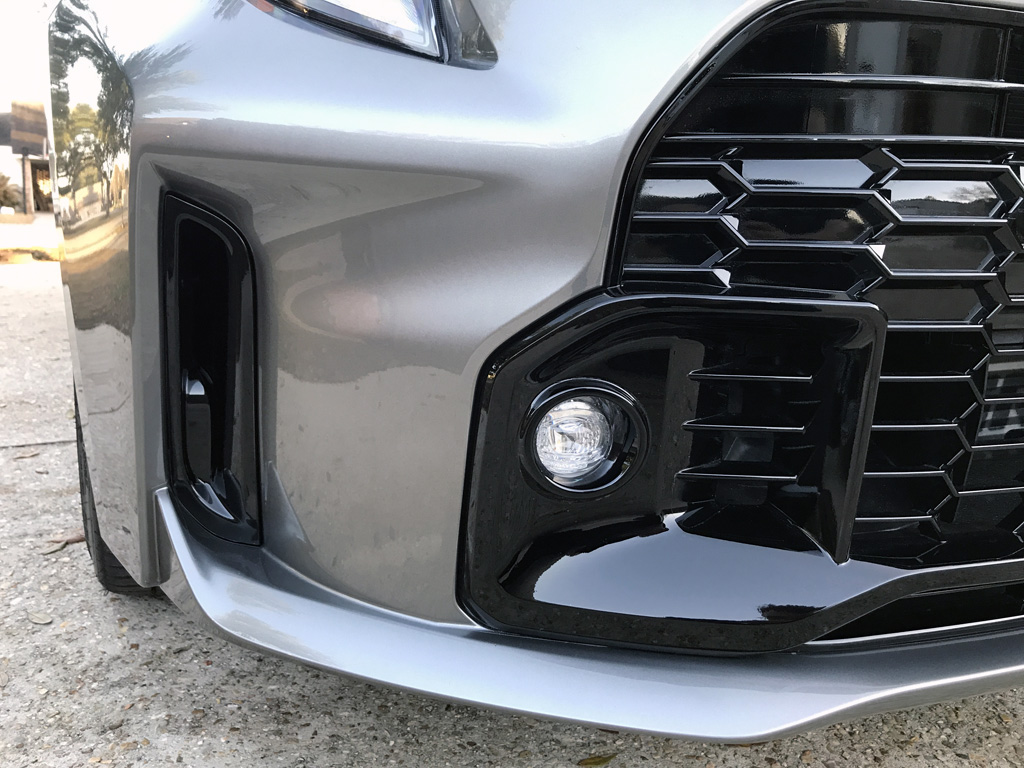
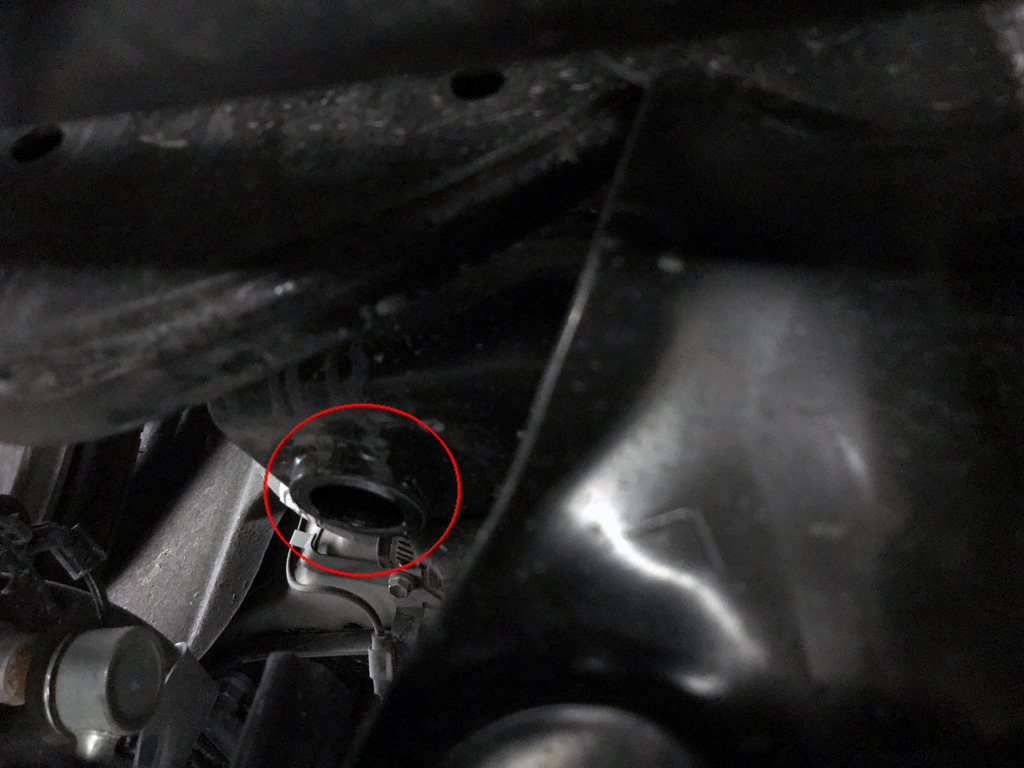
My 2023 GR Corolla came with factory blockoff plates in the front bumper for the fender ducting. As you can see in the how-to pictures below, the block-off plates are easily removed. Next, the ducting is temporarily removed while the outlet ducts are changed out with
the new units. Next, the fender well ducting is reinstalled followed by the front bumper inlet on each side.
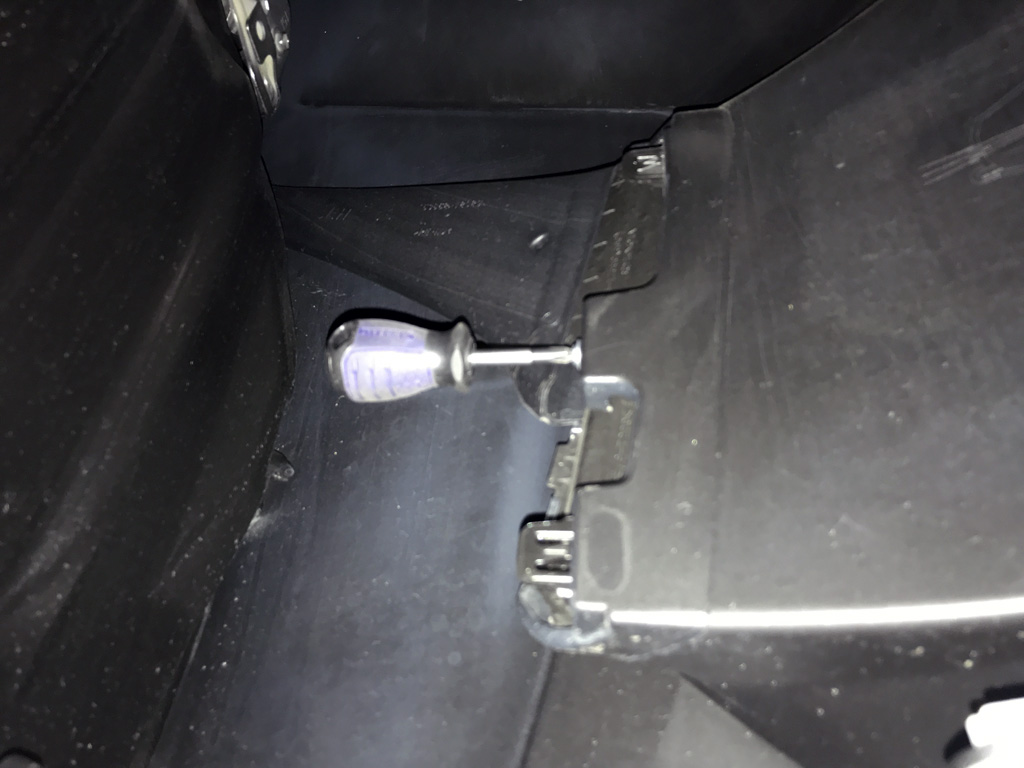
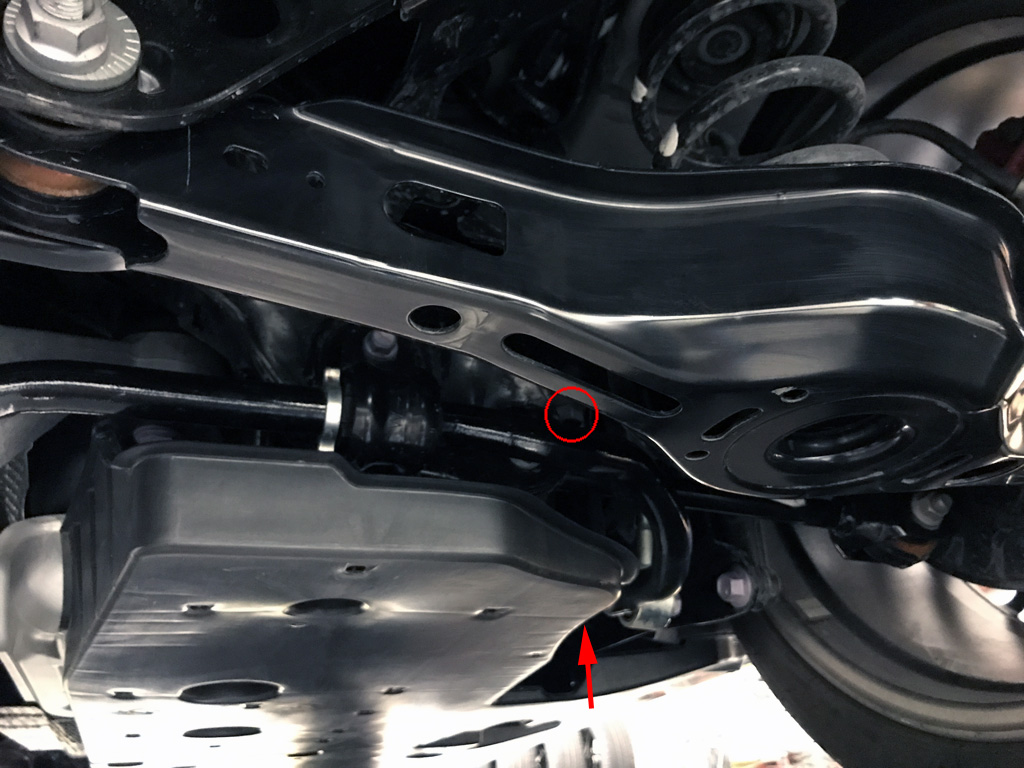
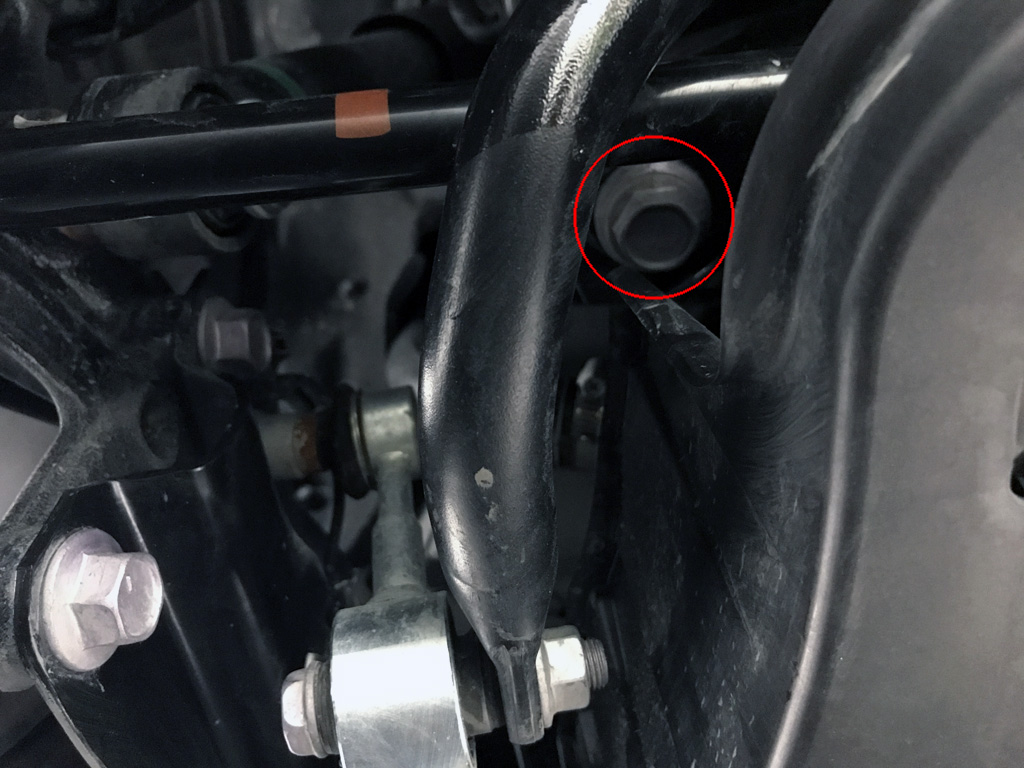
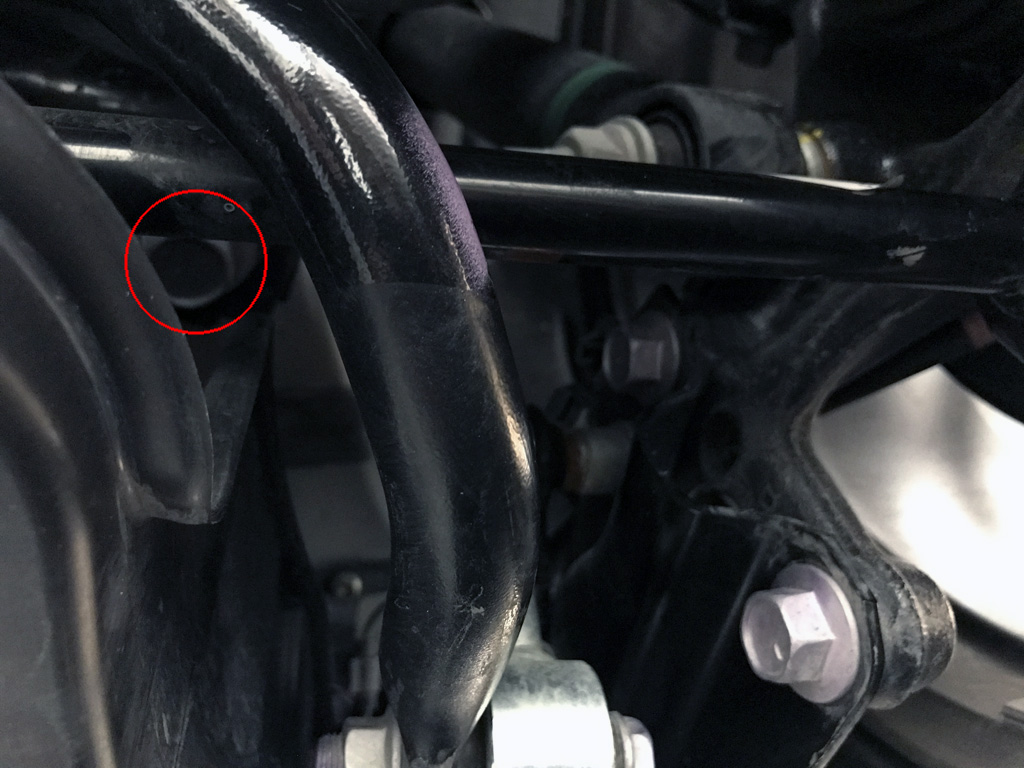
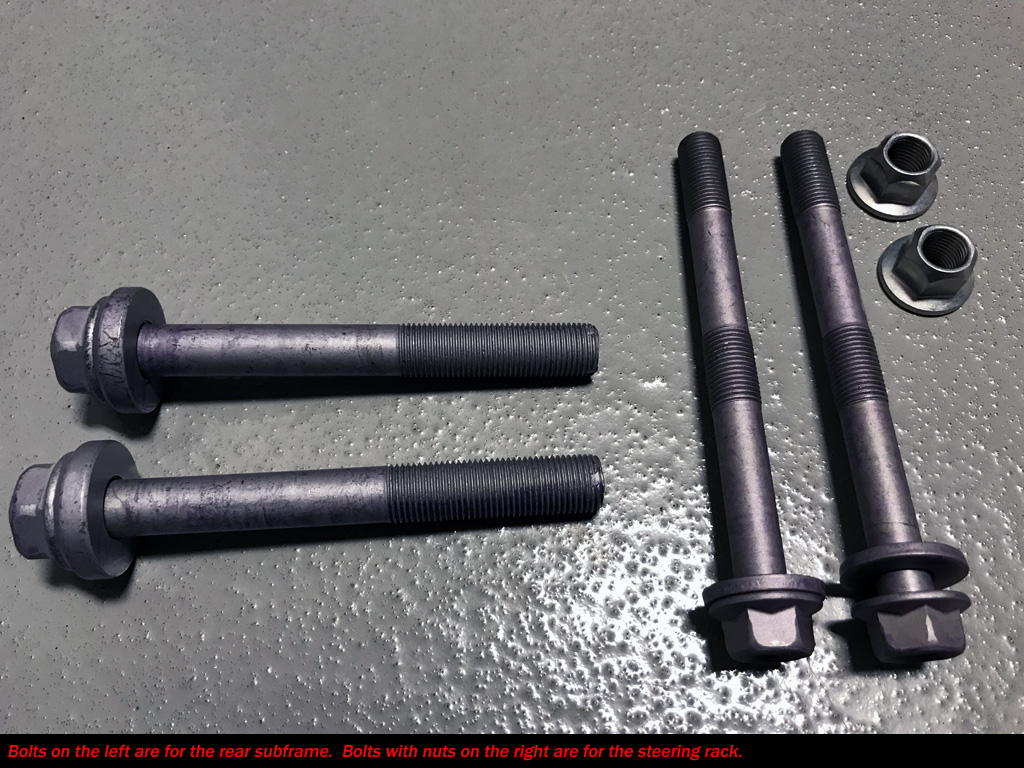
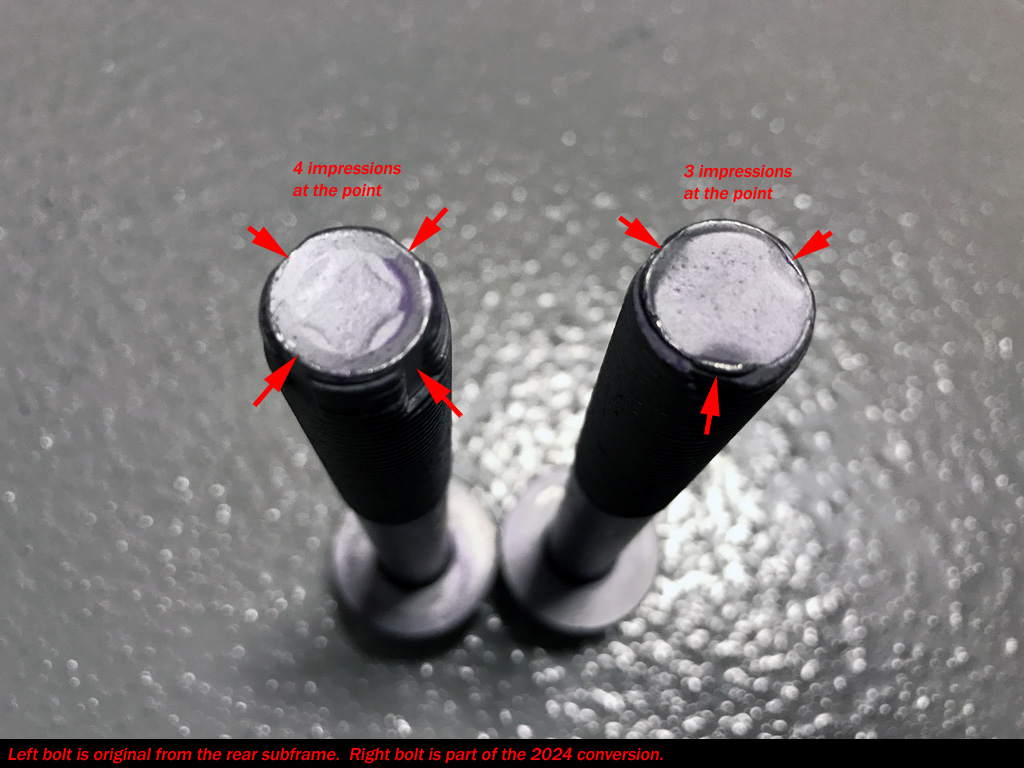
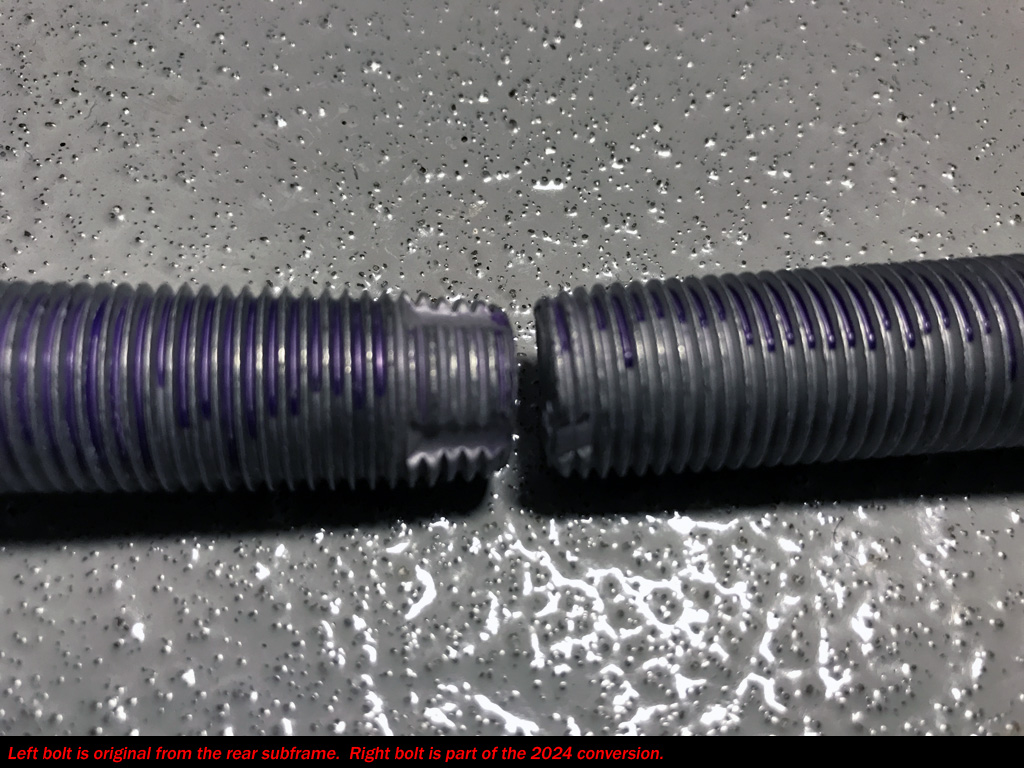
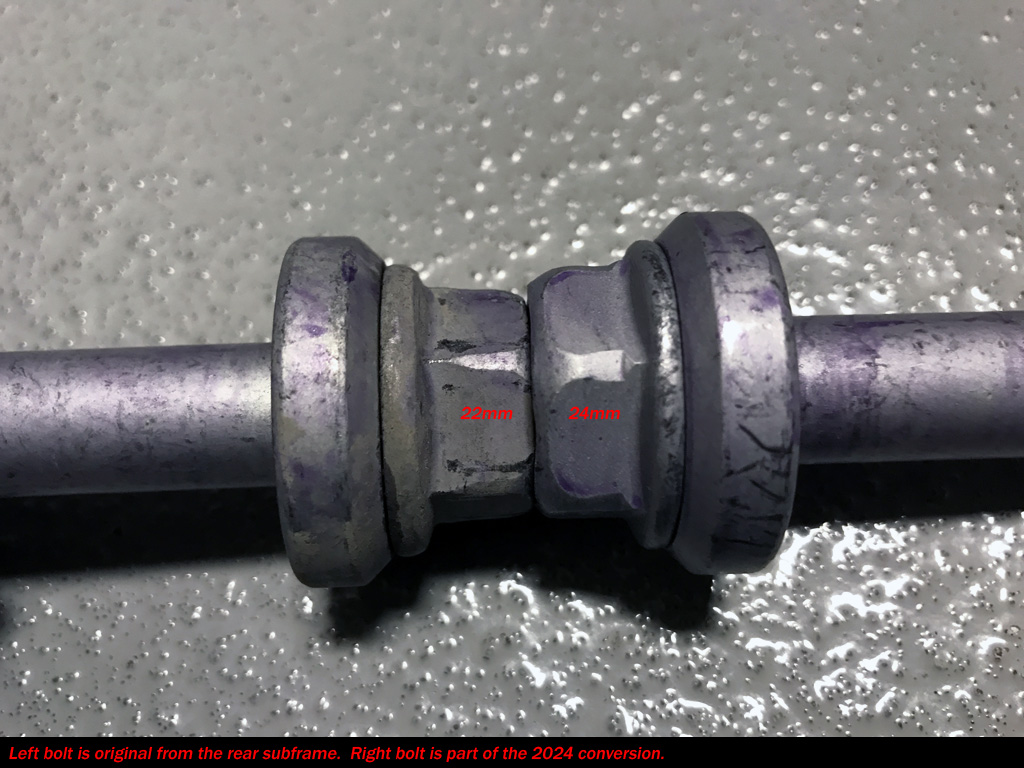
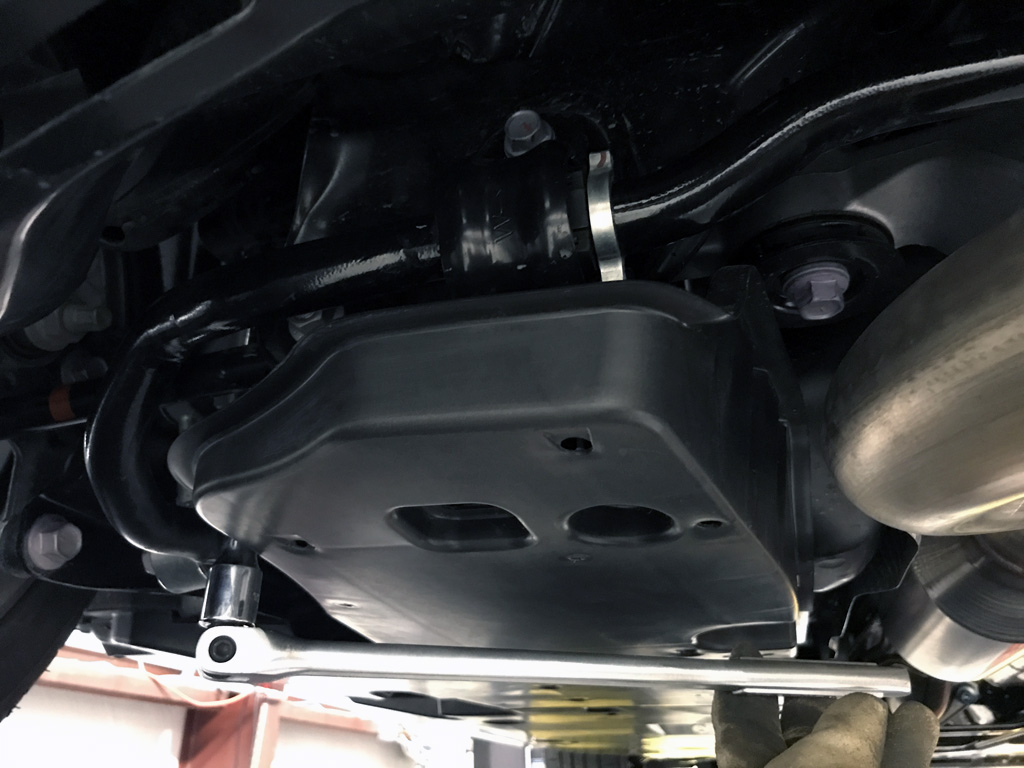
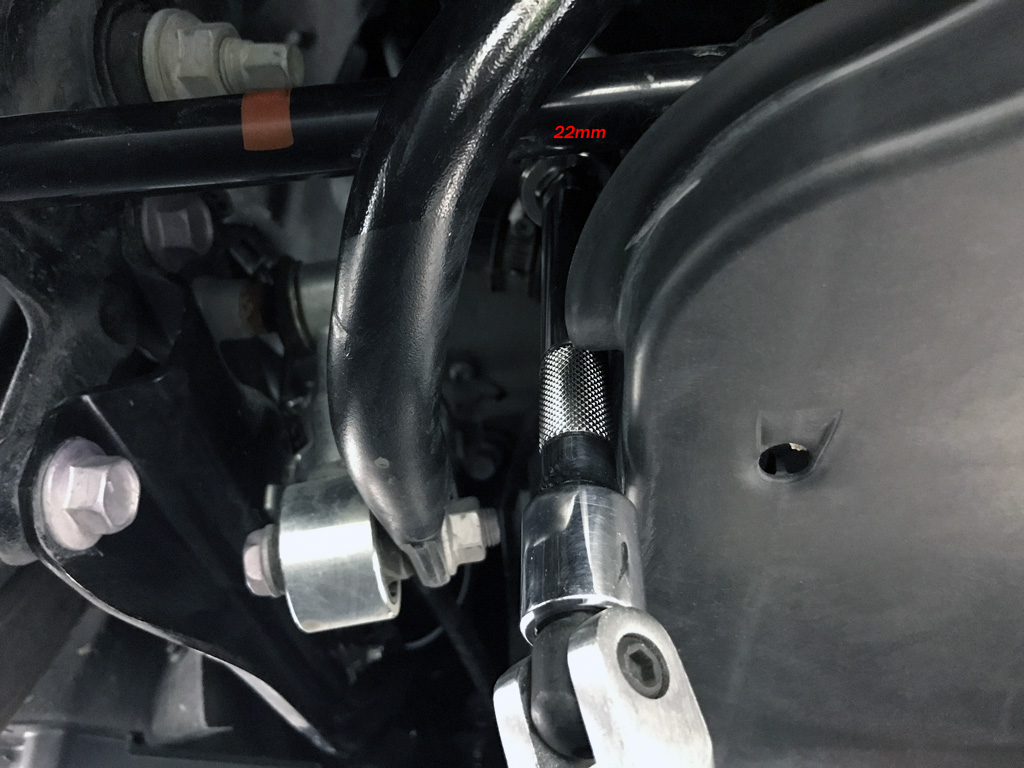
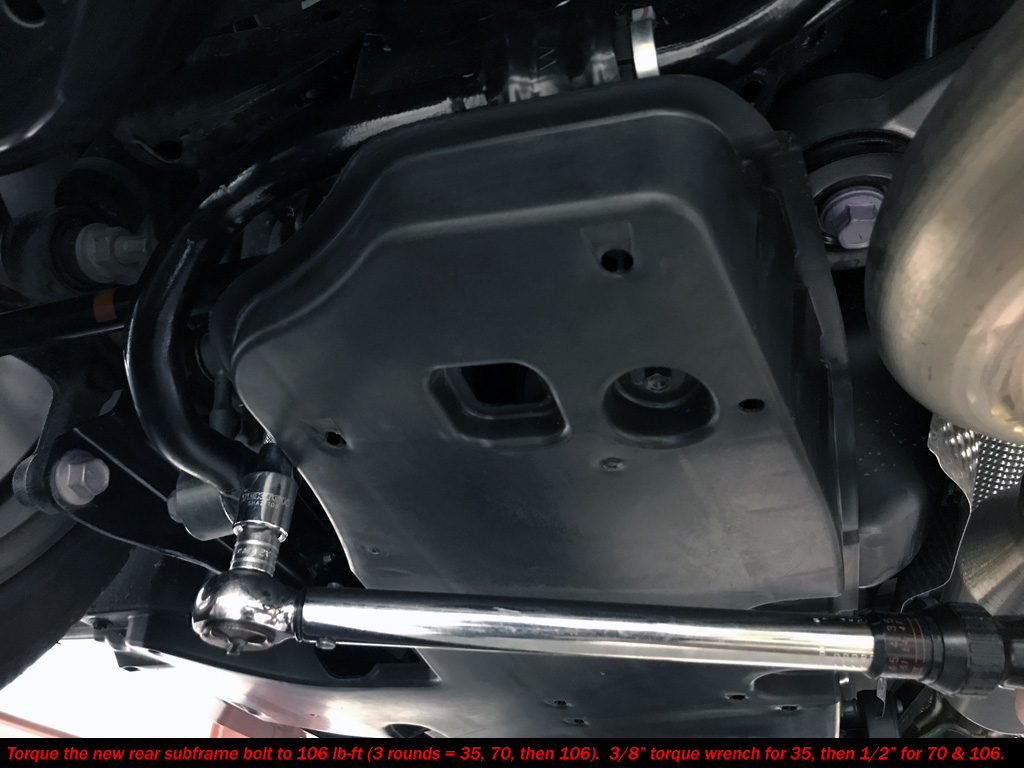
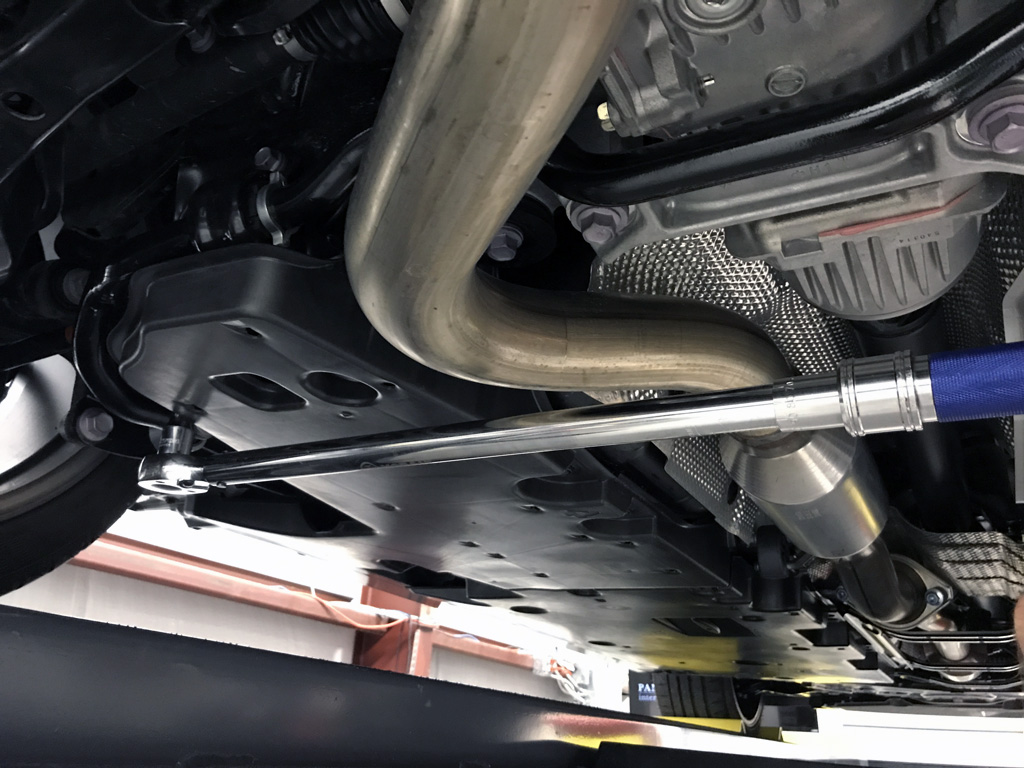
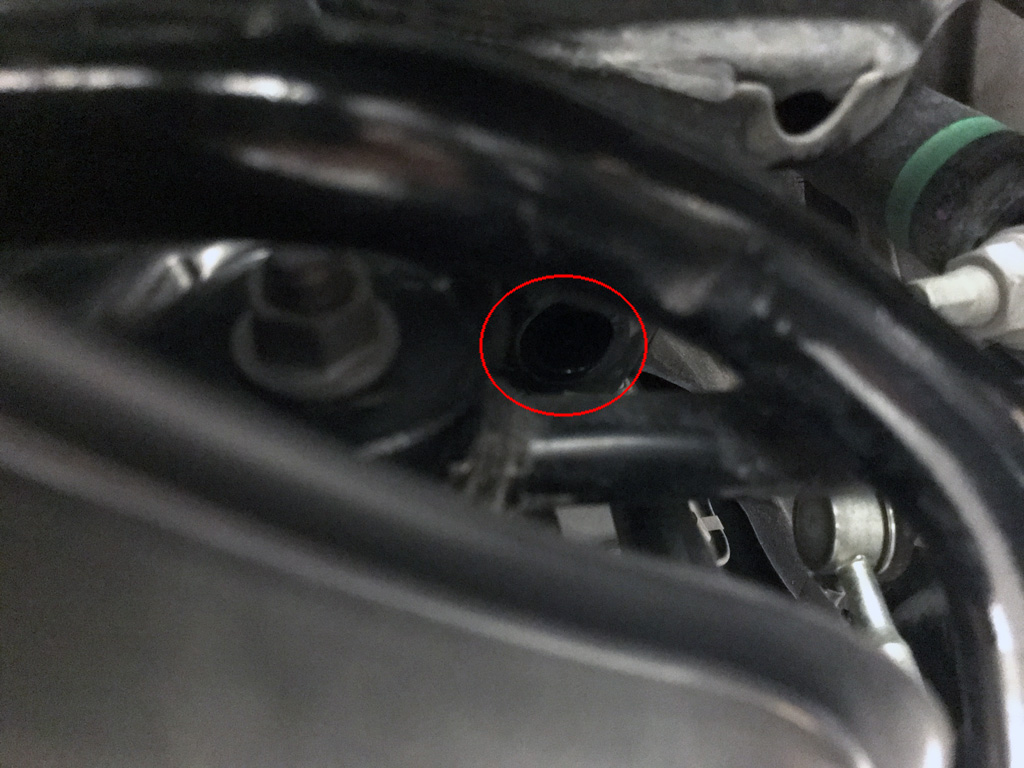
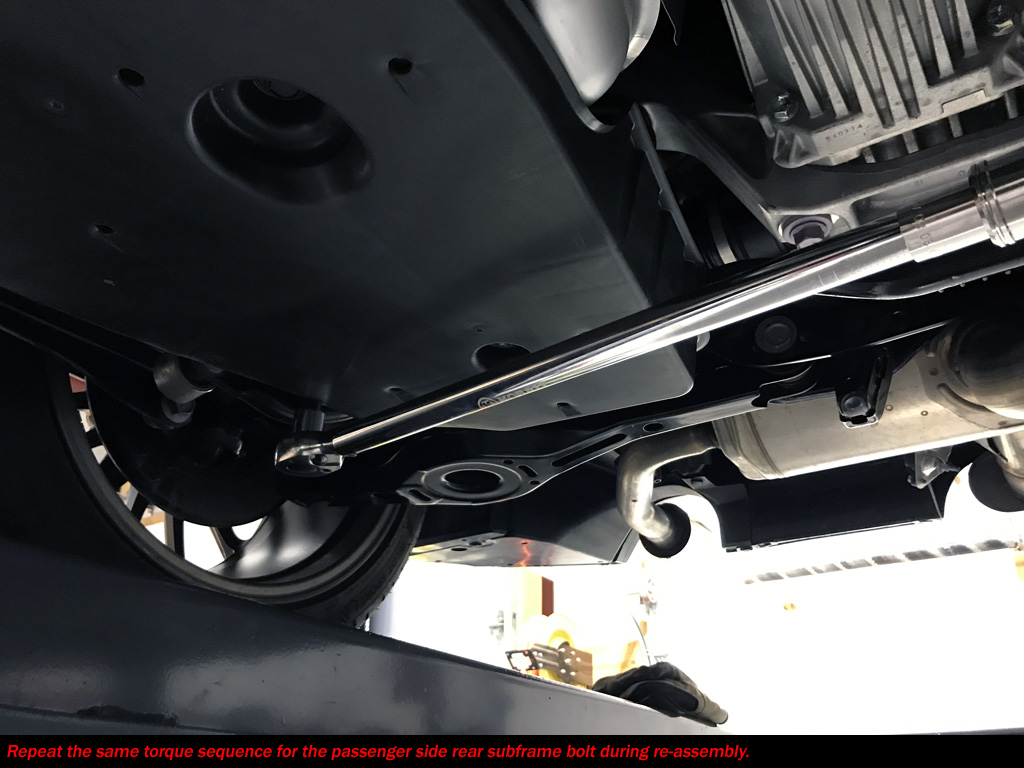
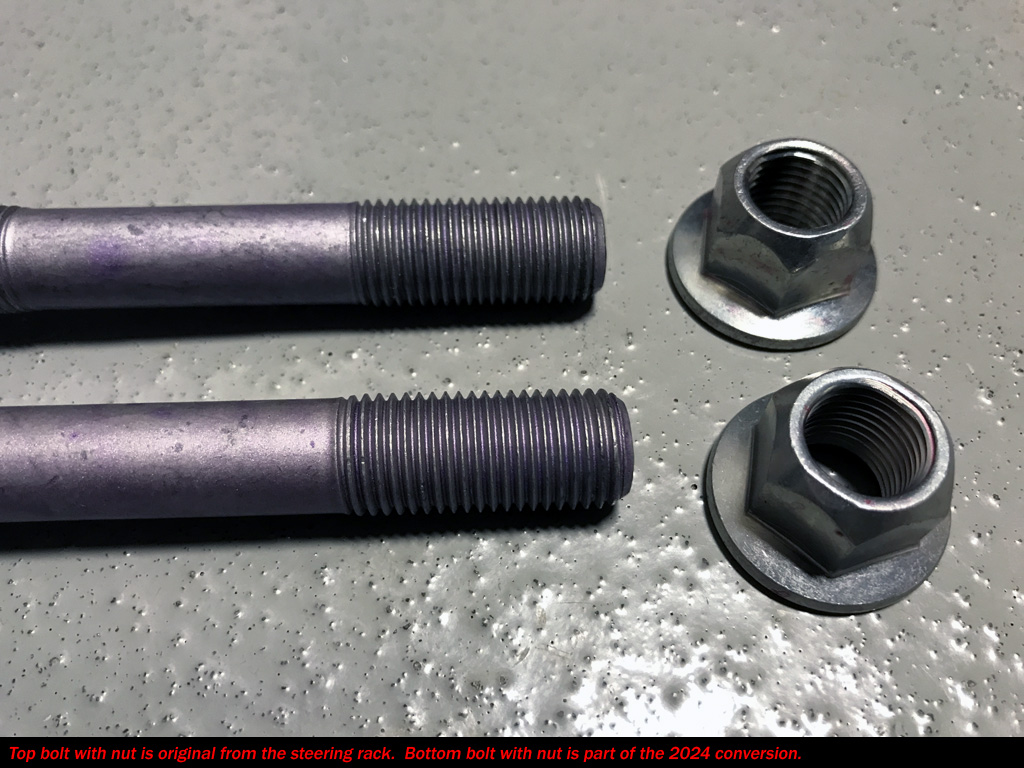
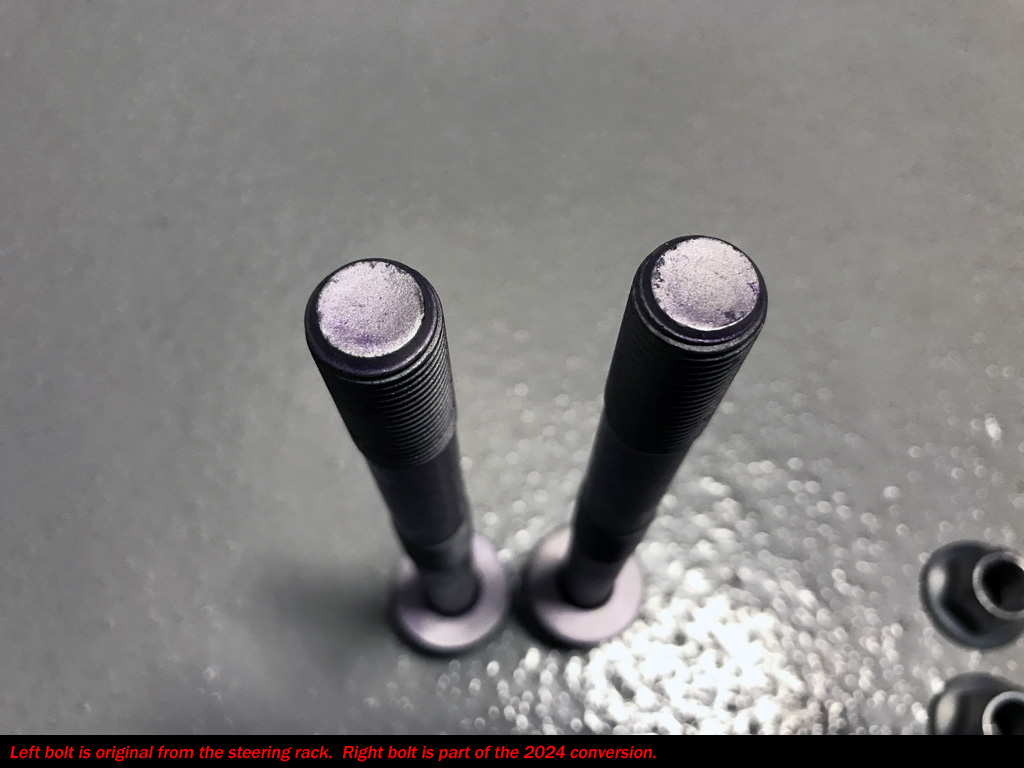
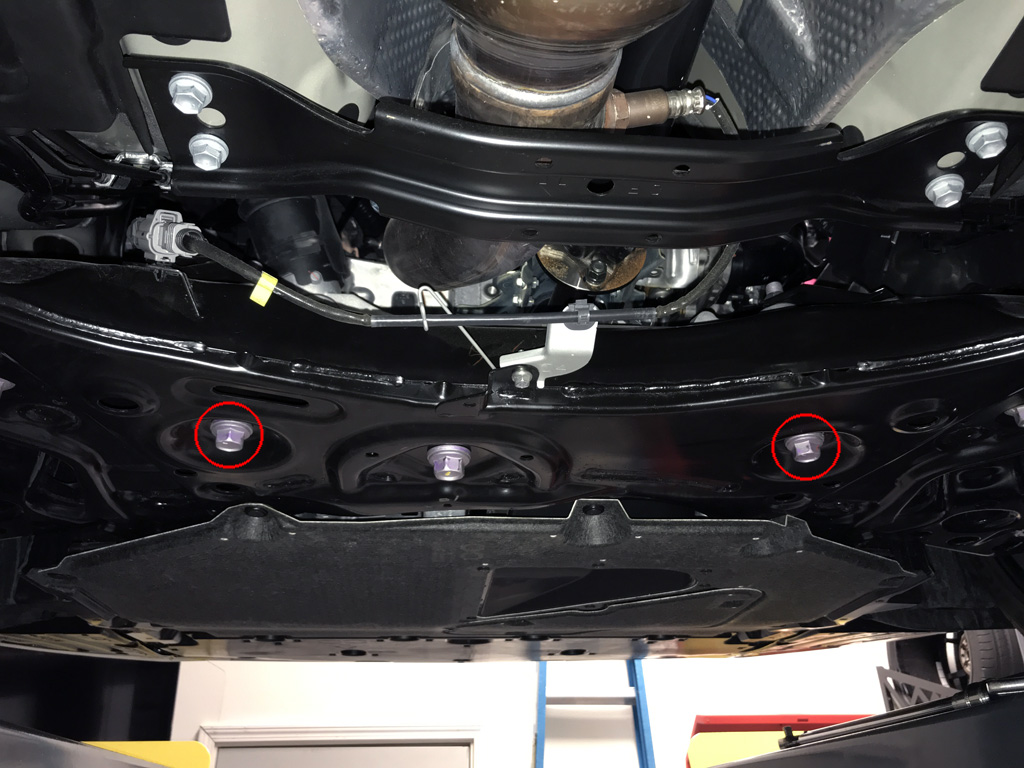
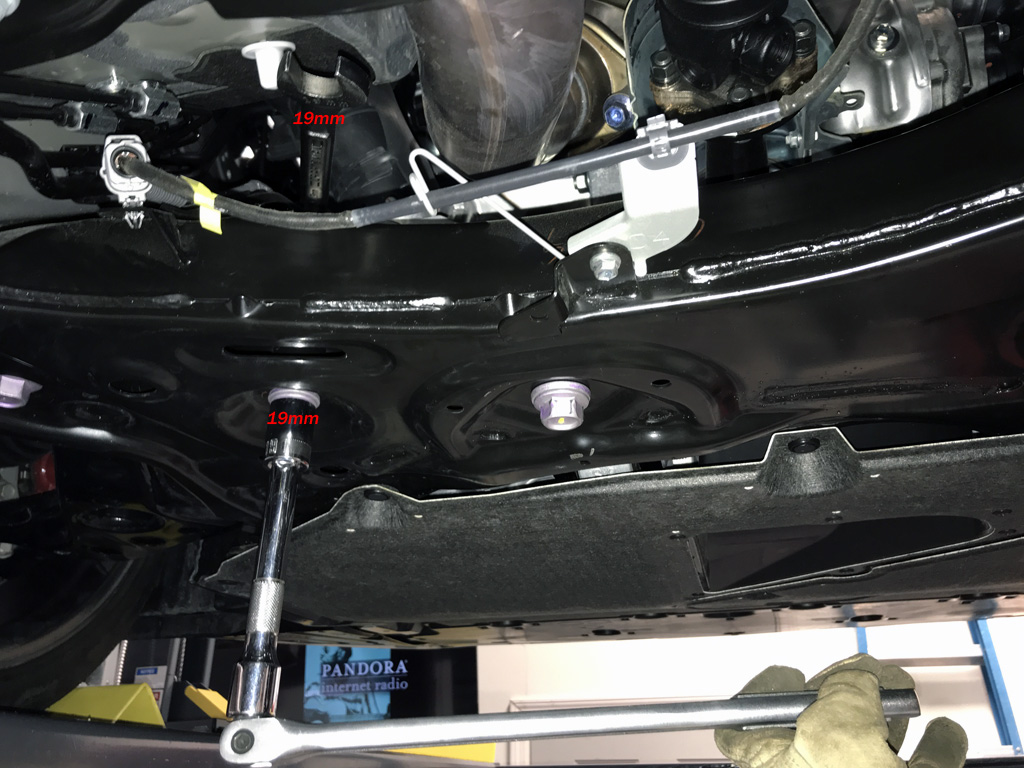
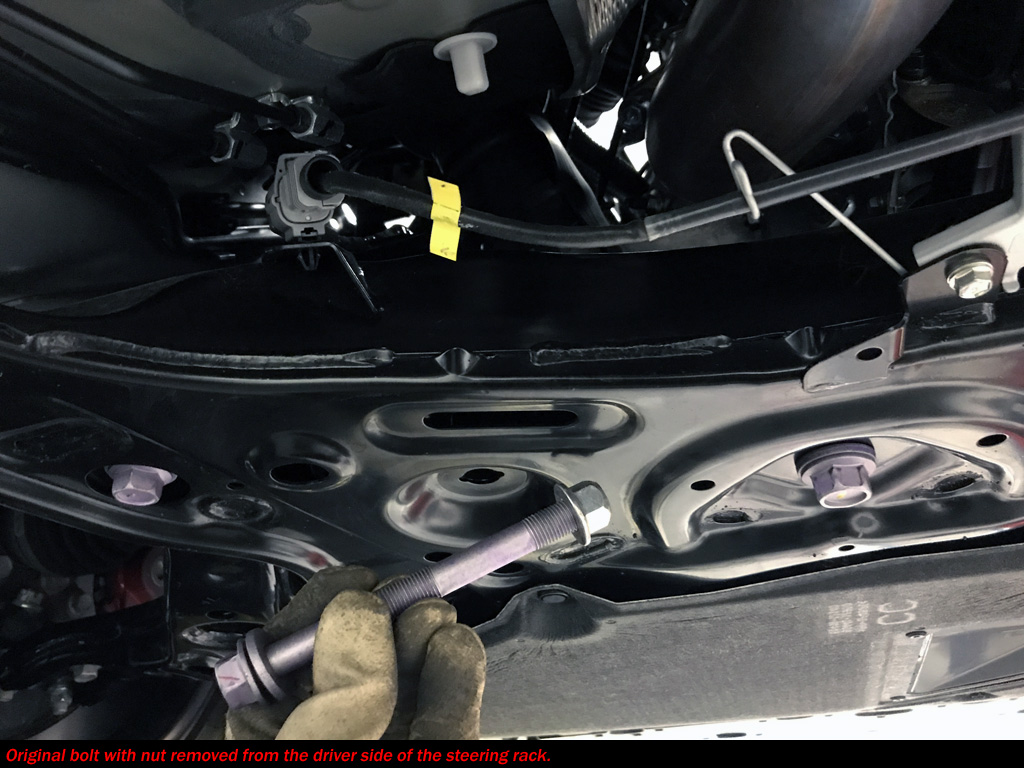
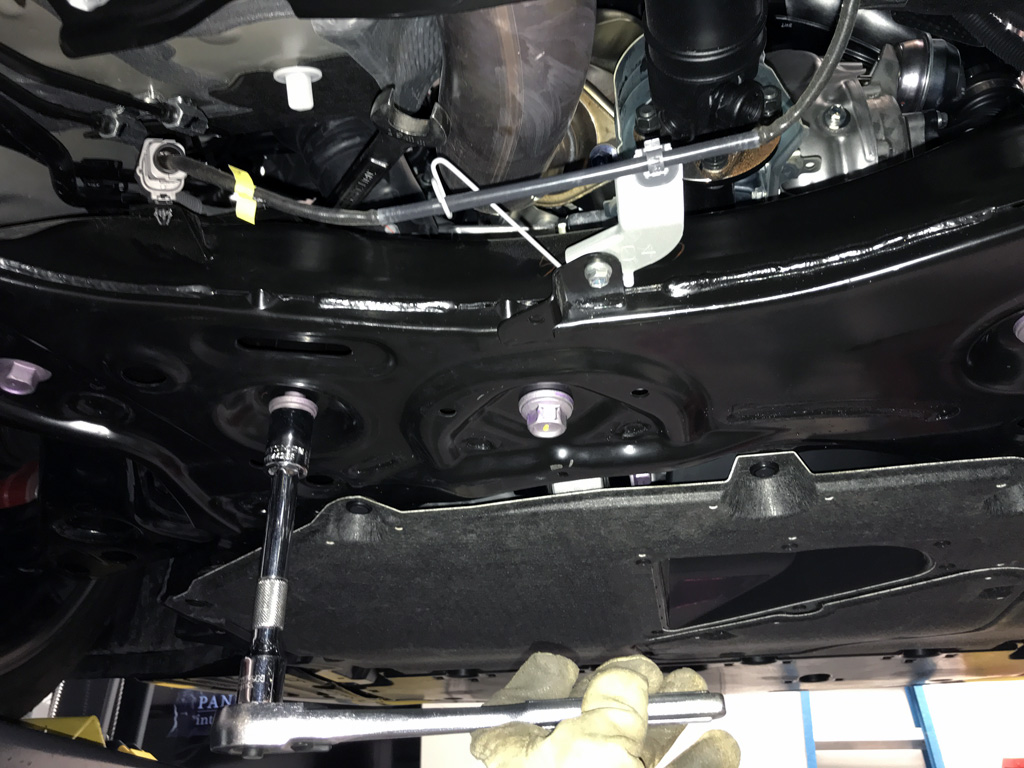
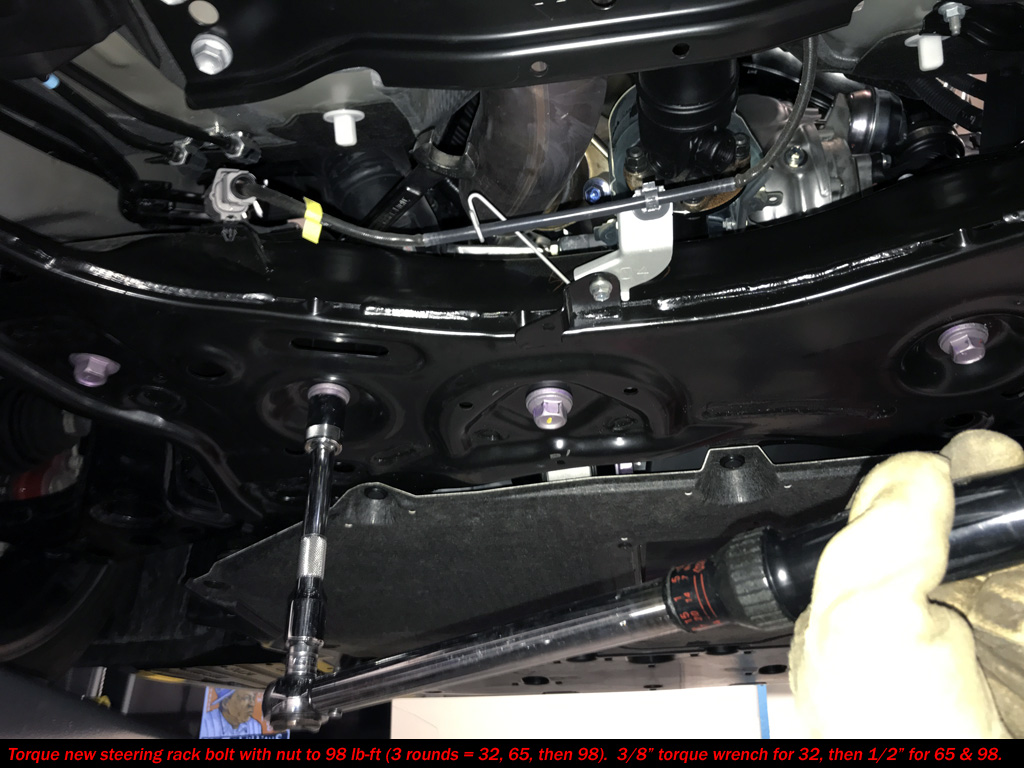
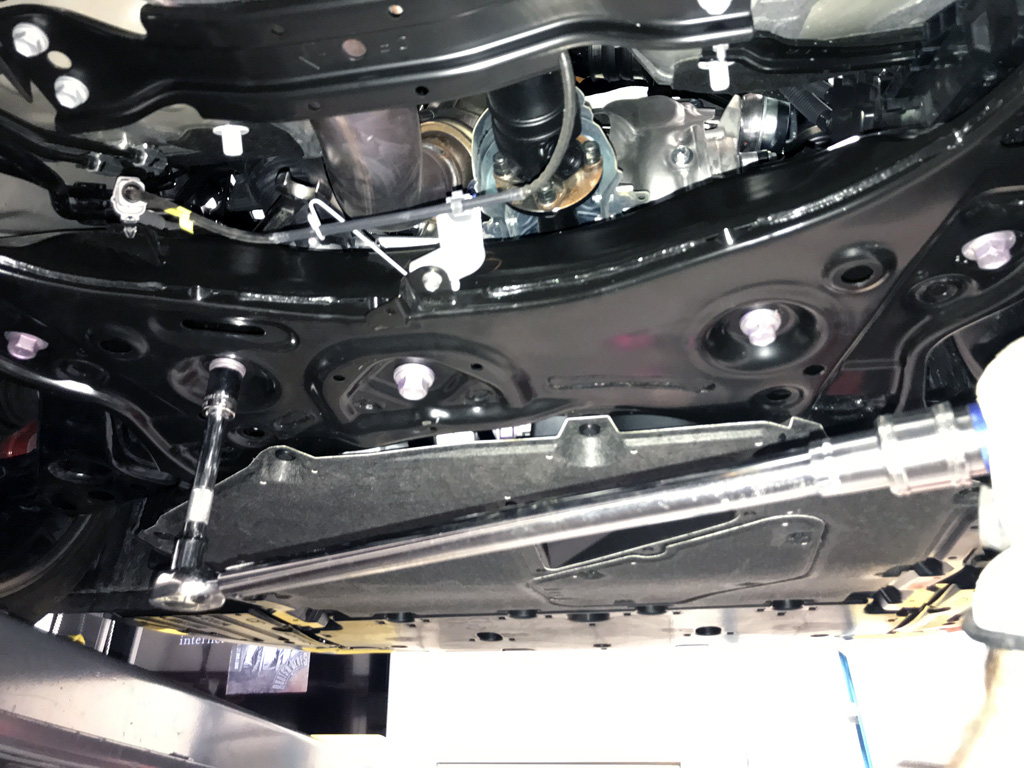
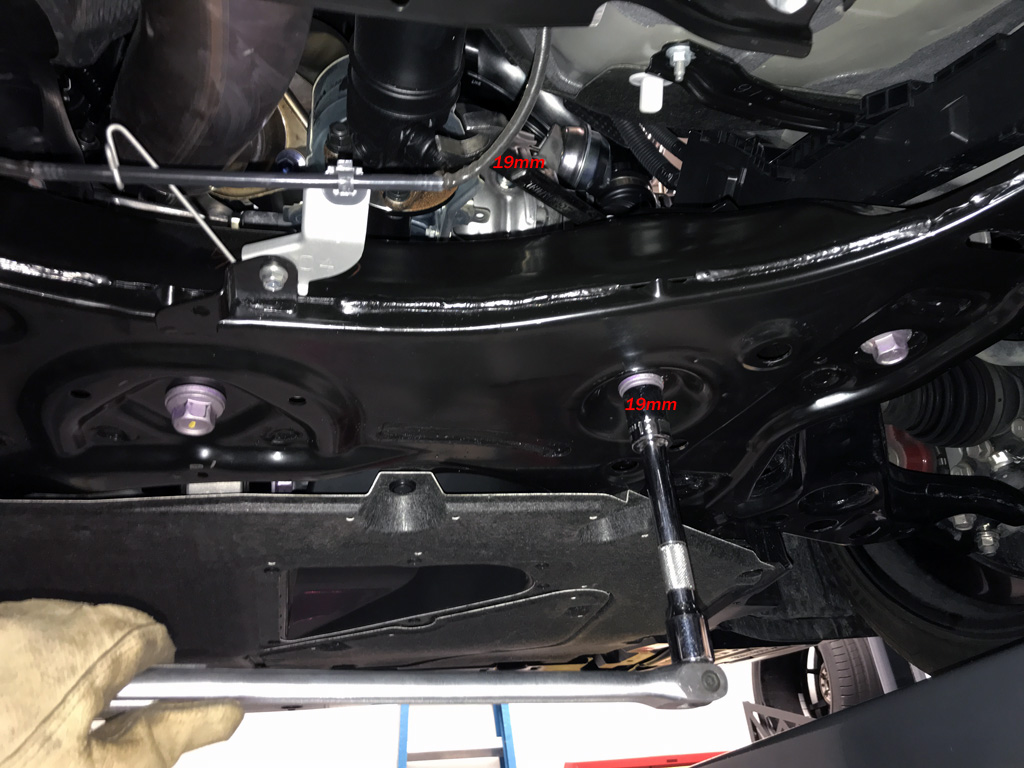
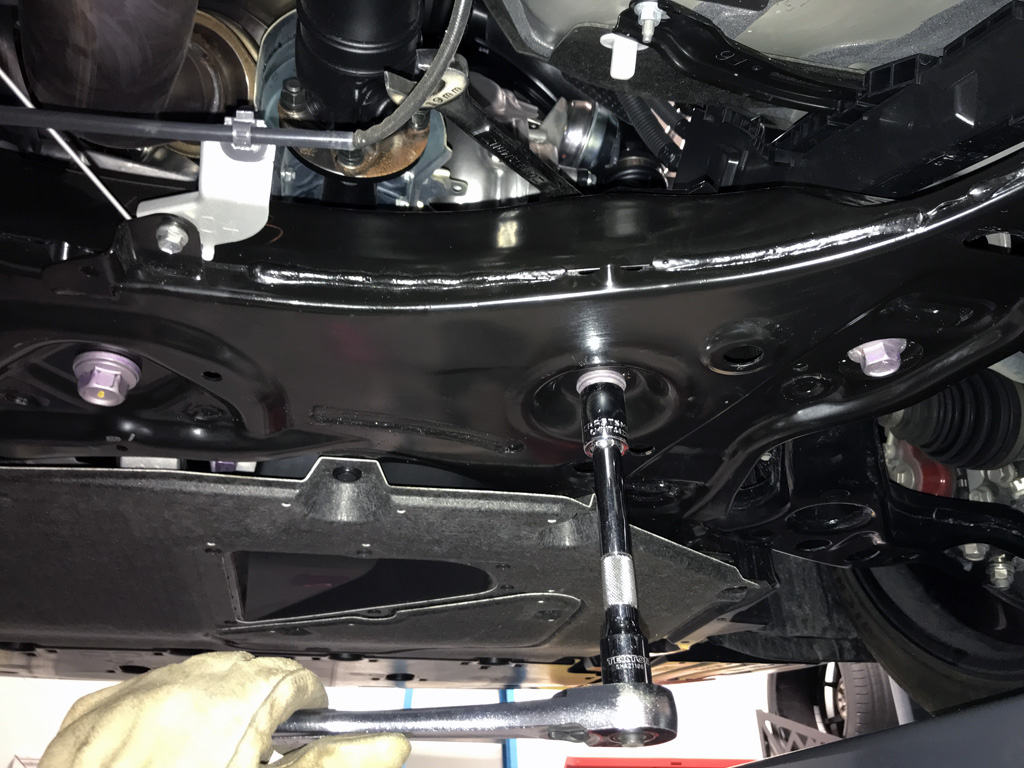
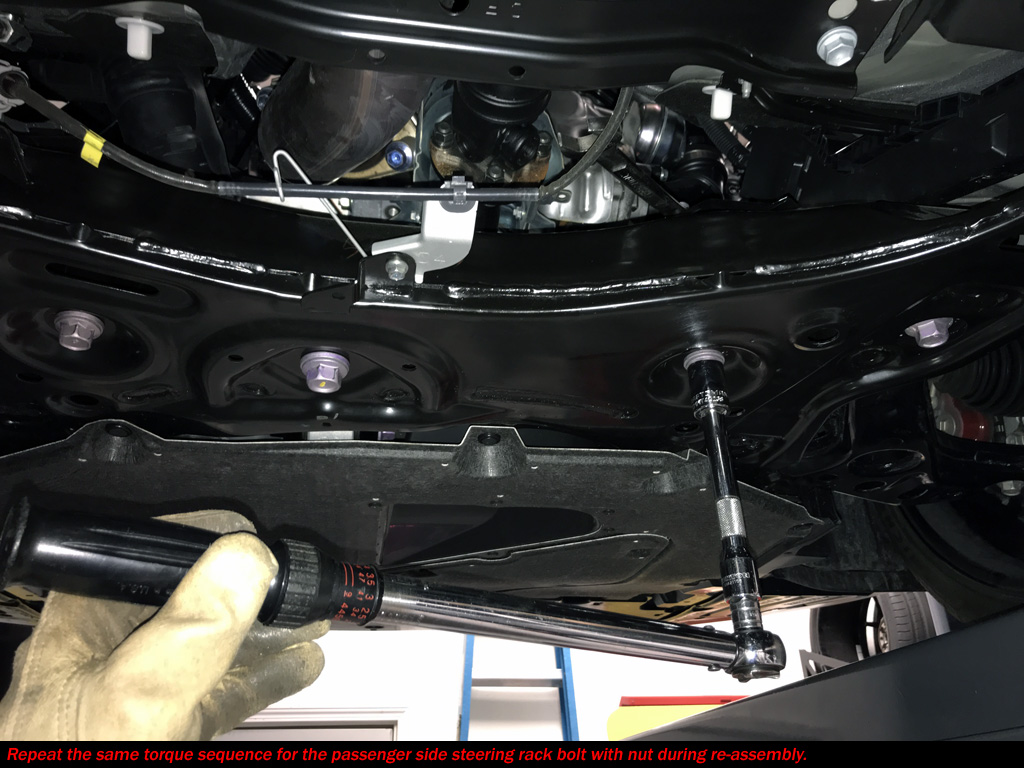
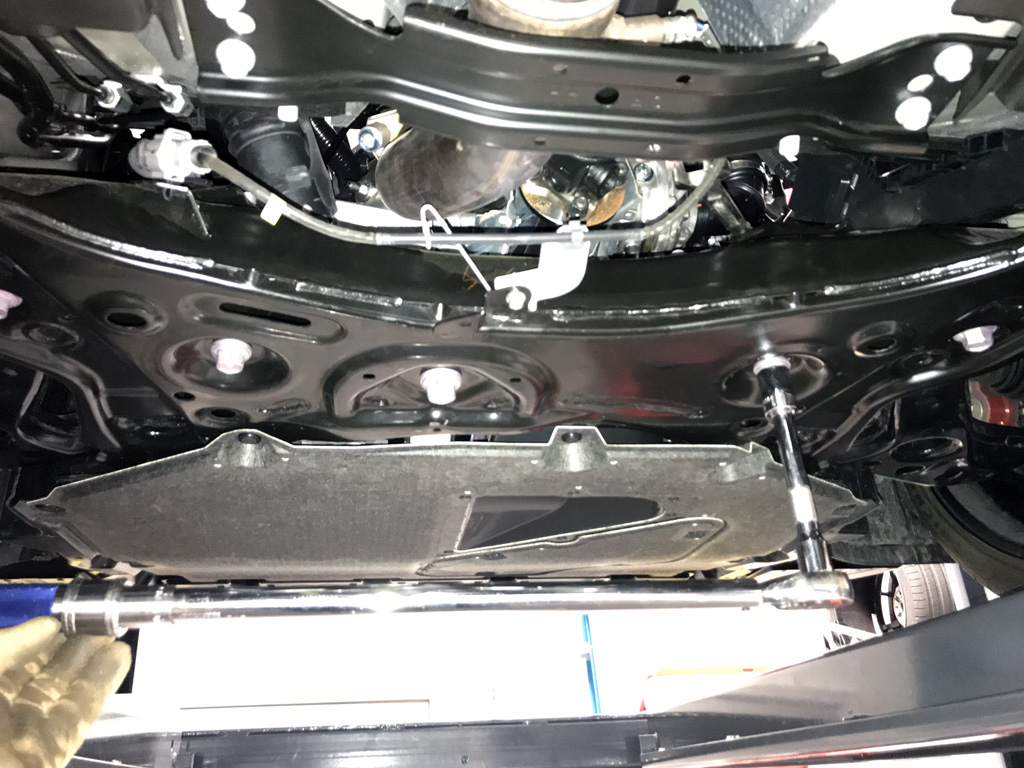
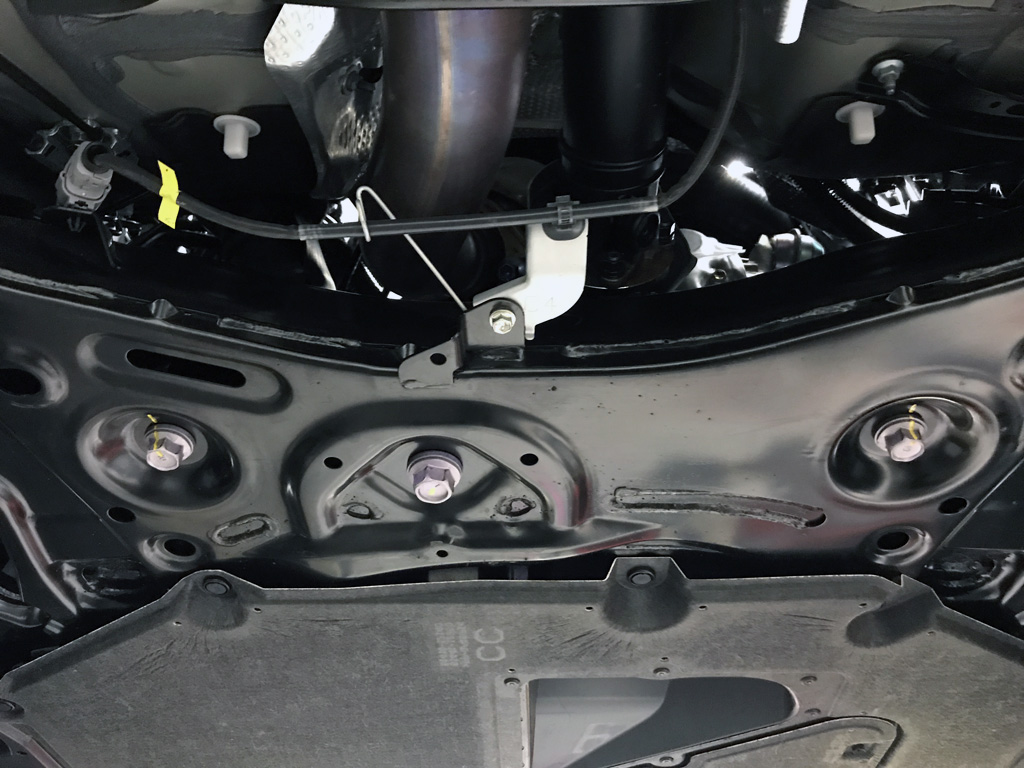
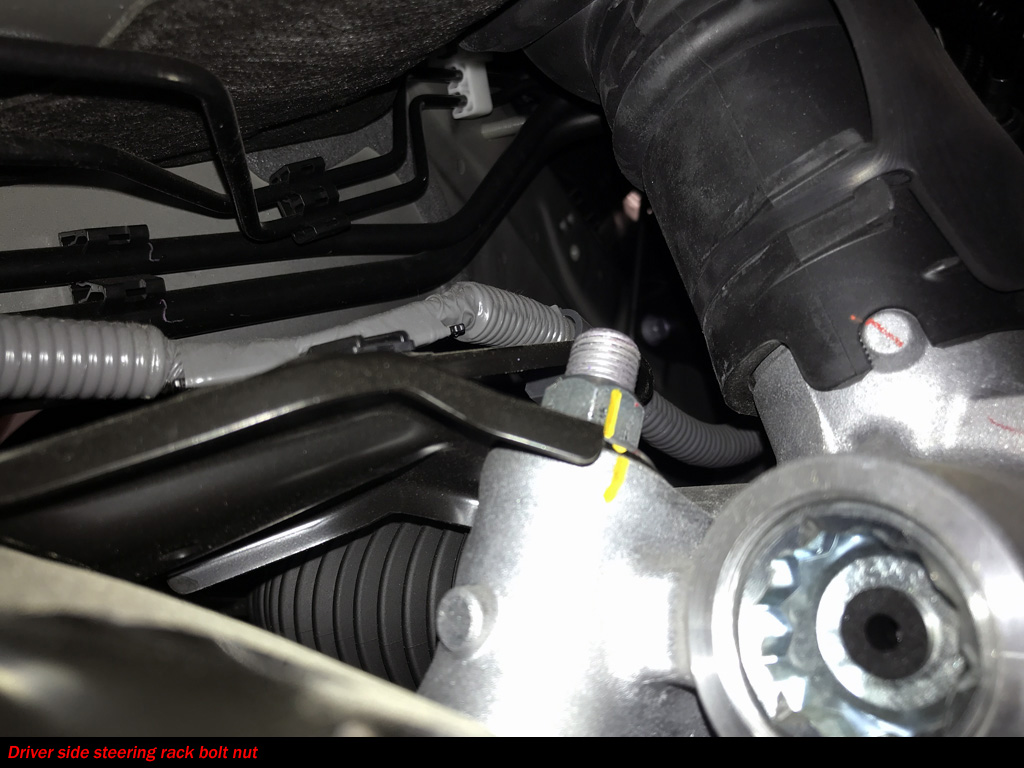
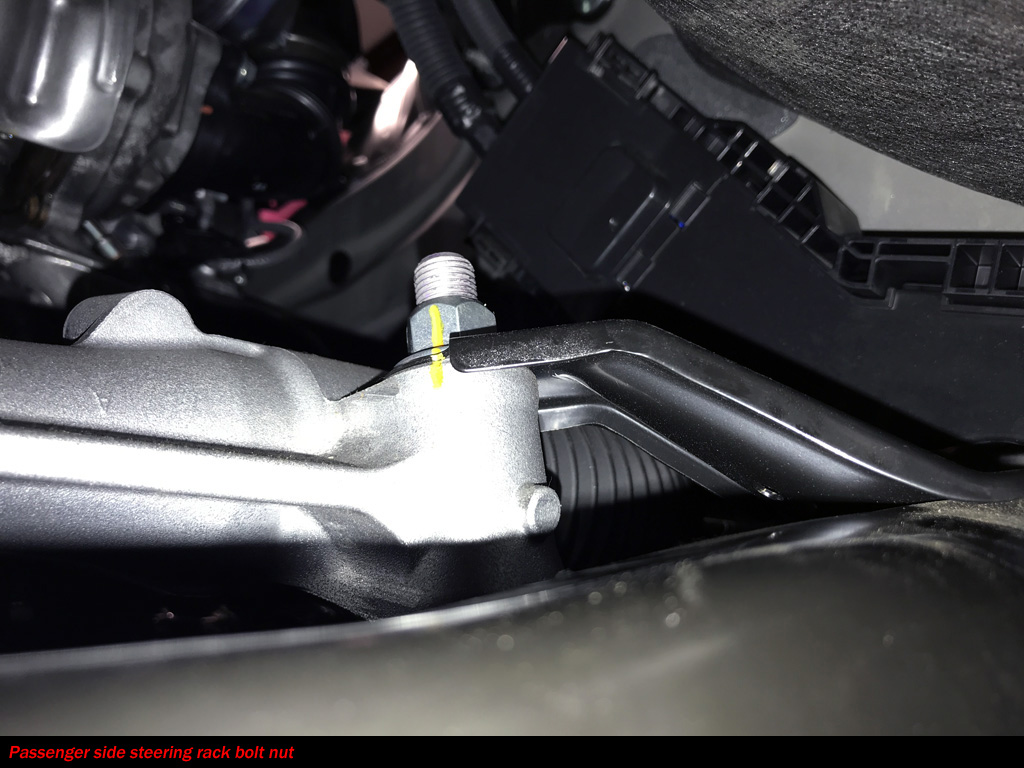
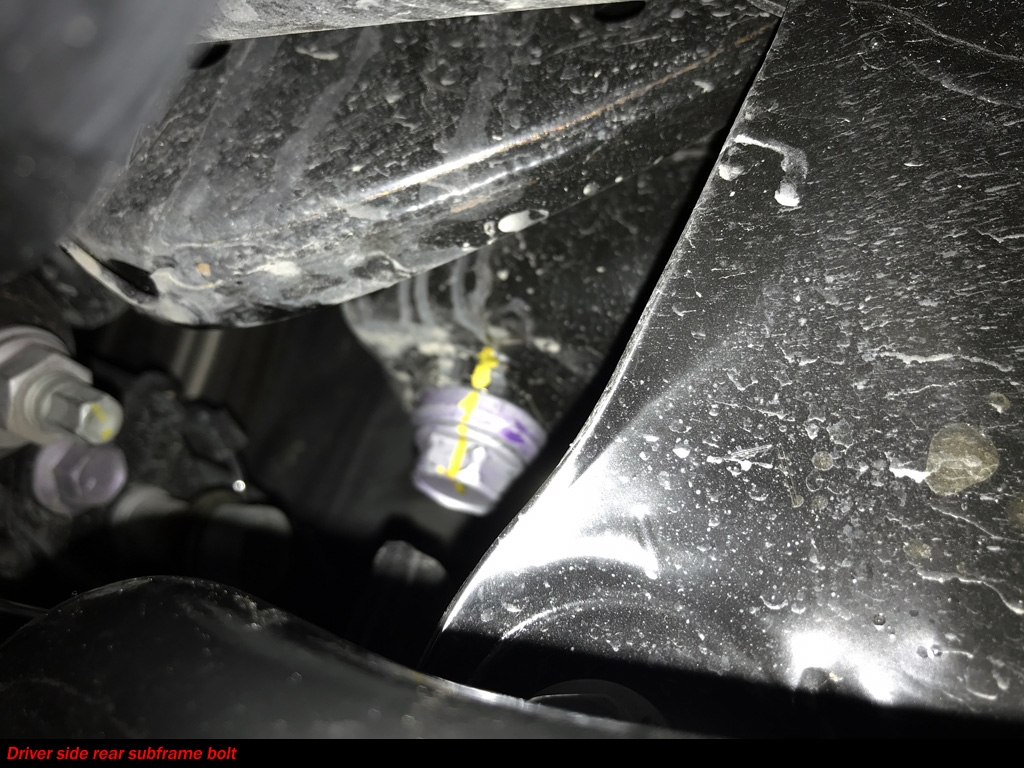
Next, Ken installs revised hardware for the rear subframe and steering rack. Very easy process of removing one rear subframe bolt and replacing with new. On the steering rack, the top nut is removed along with the long bolt. Only the (2) bolts with nuts are replaced on the steering rack.
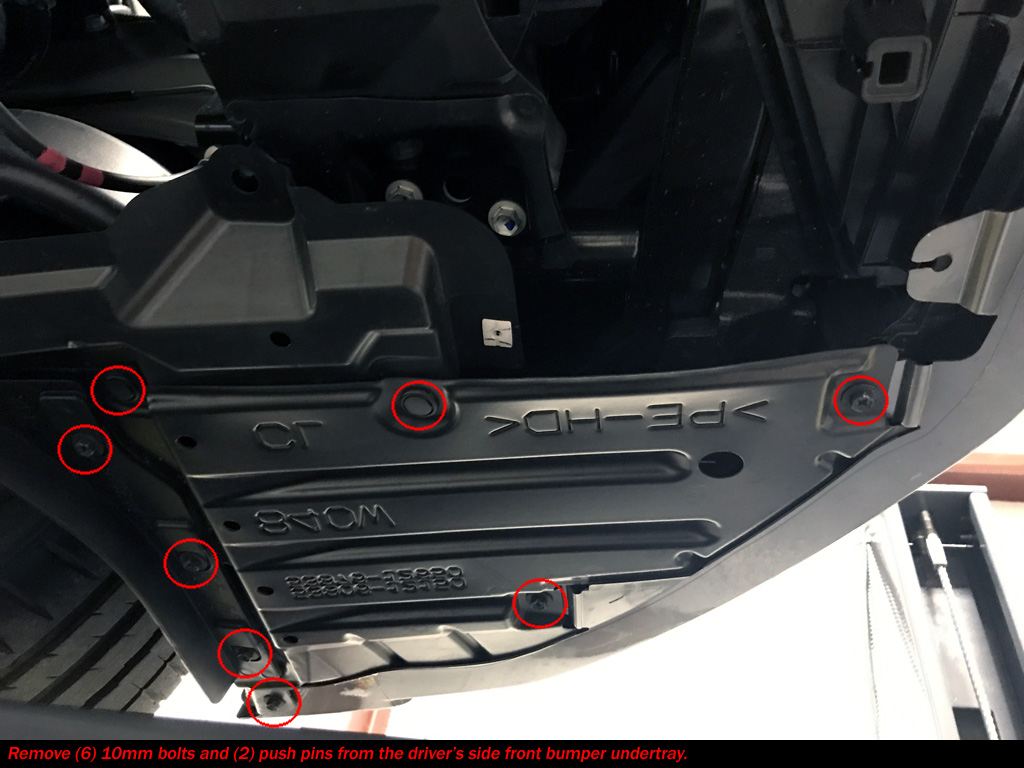
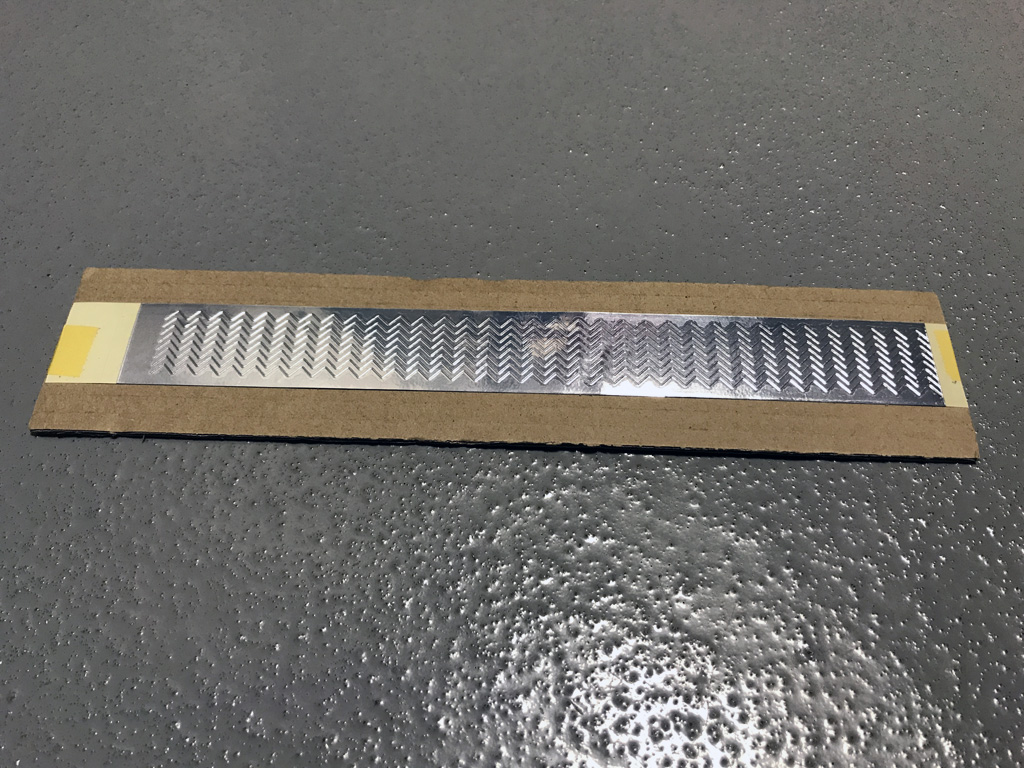
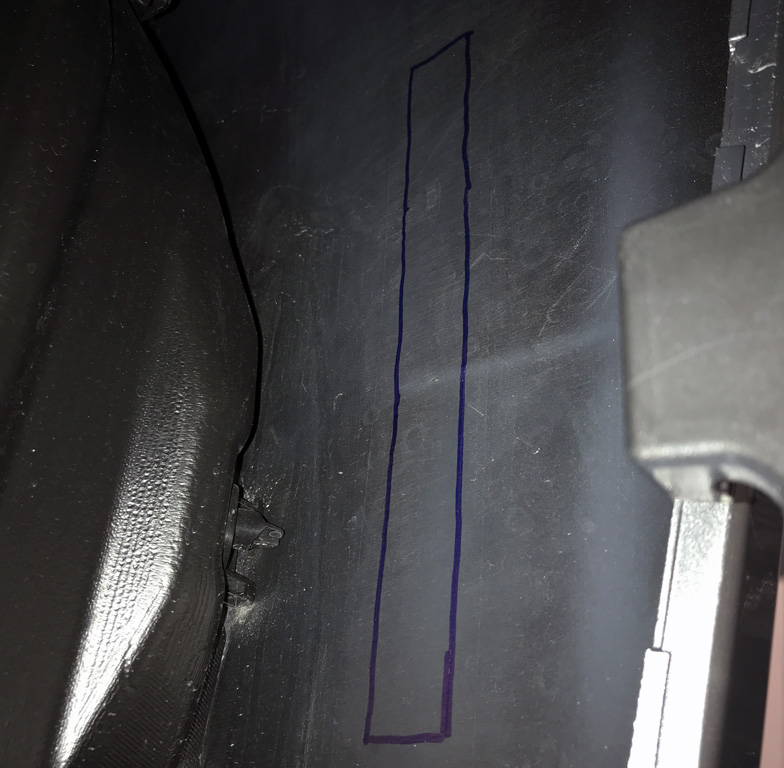
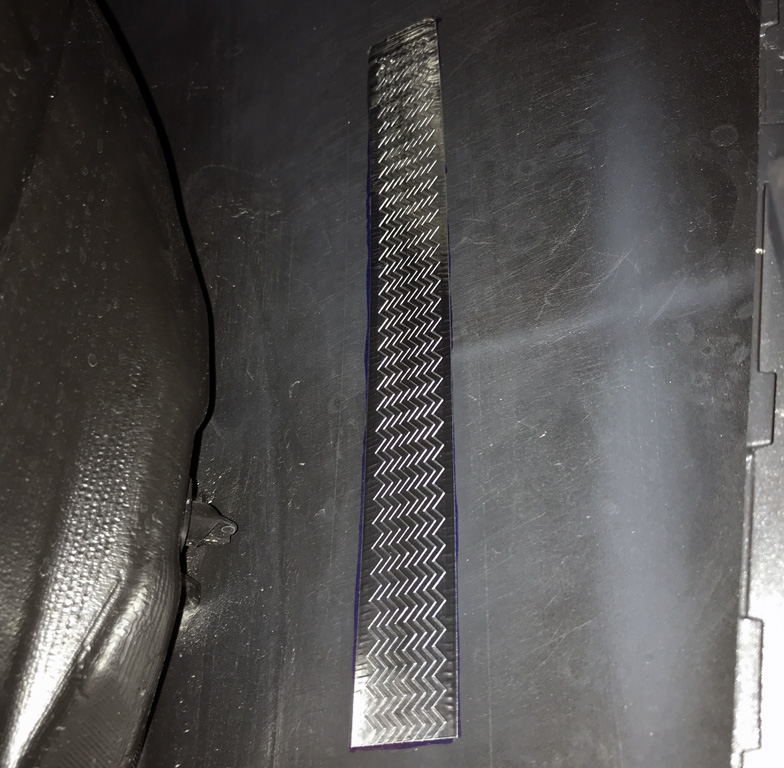
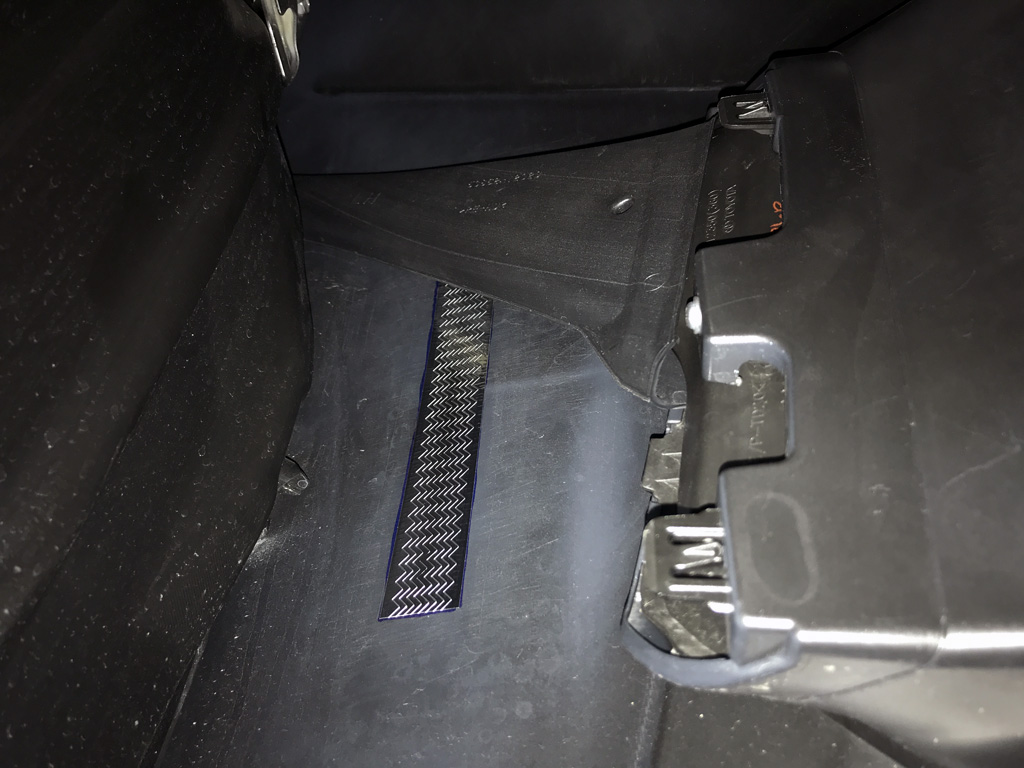
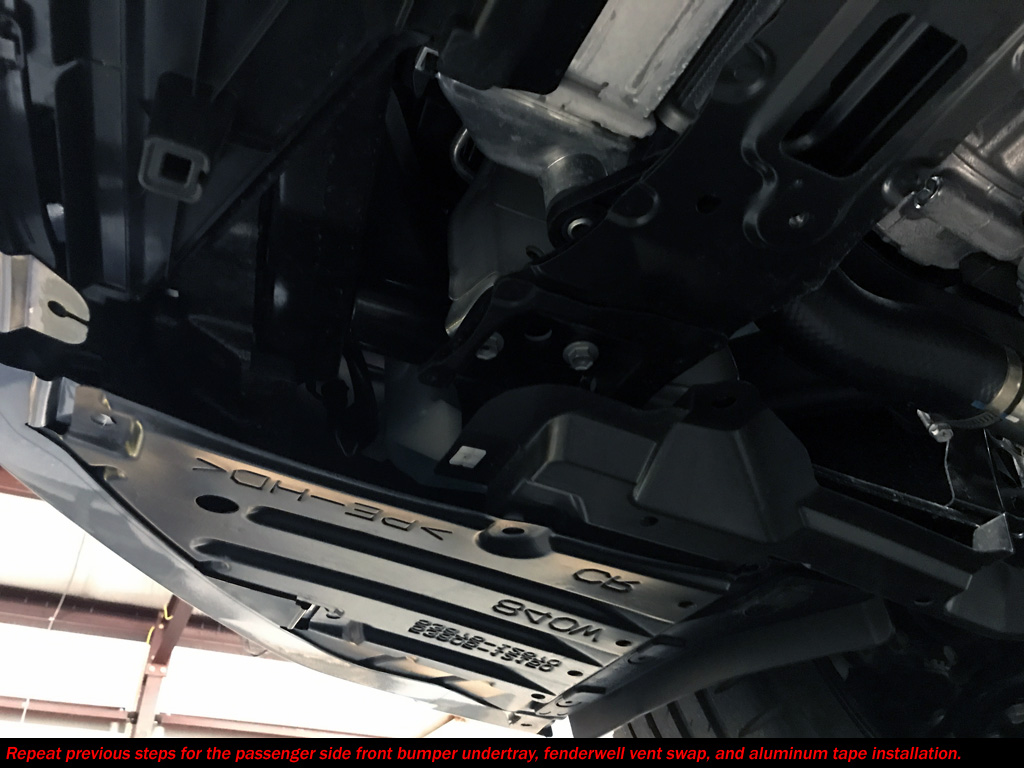
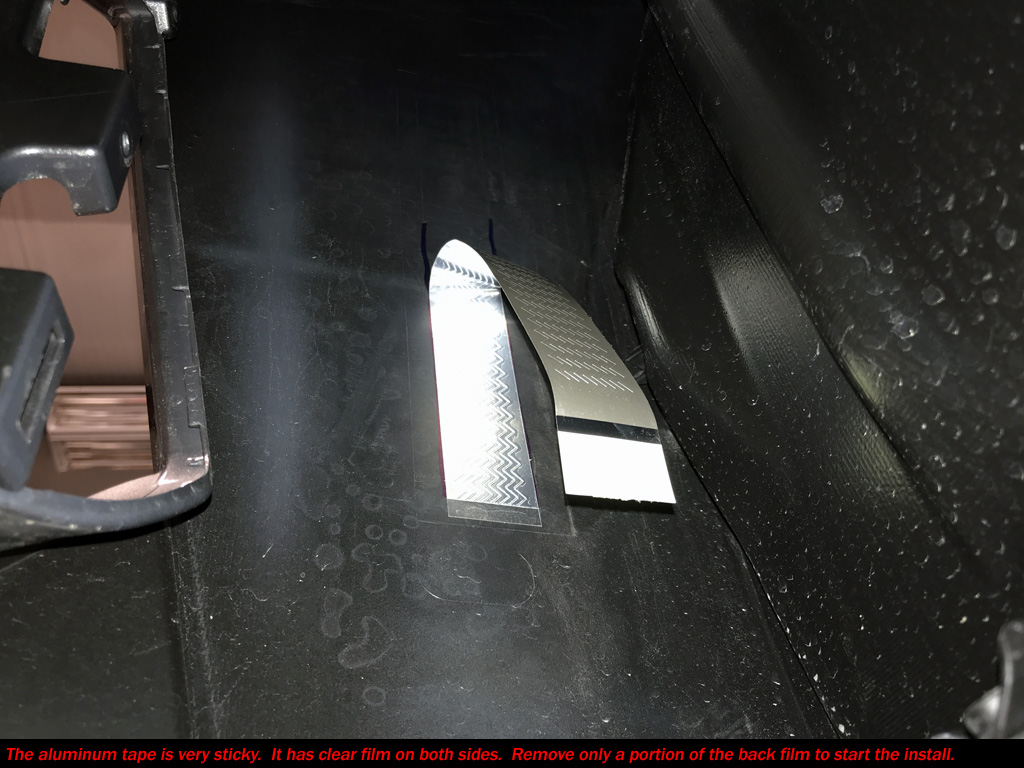
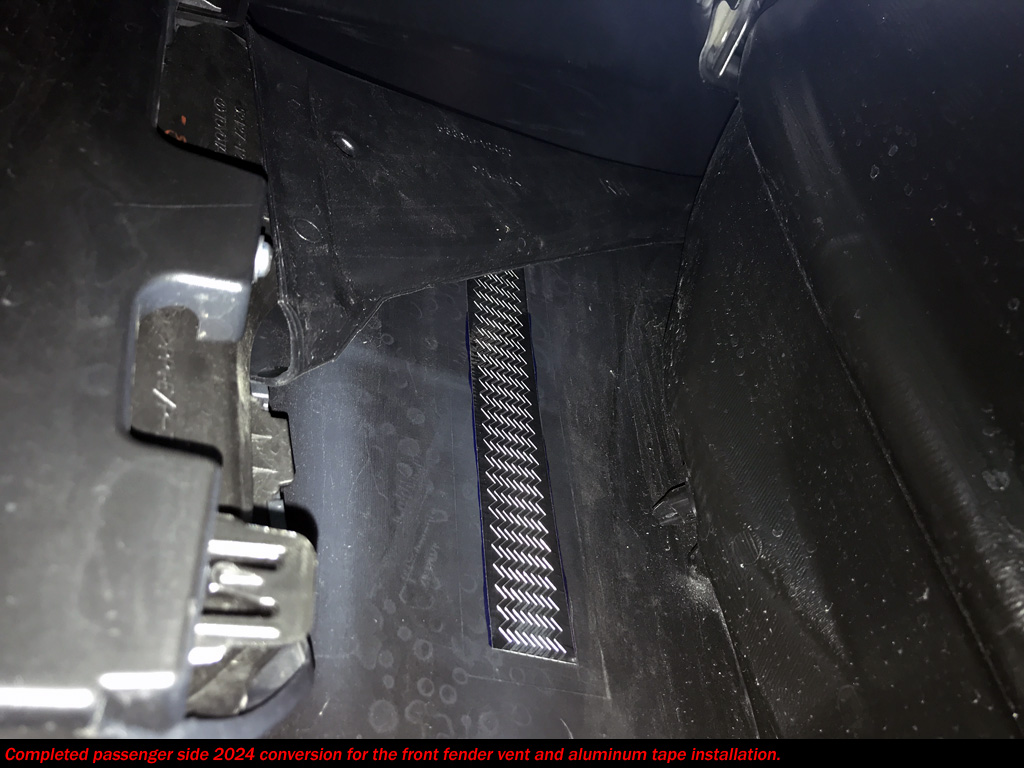
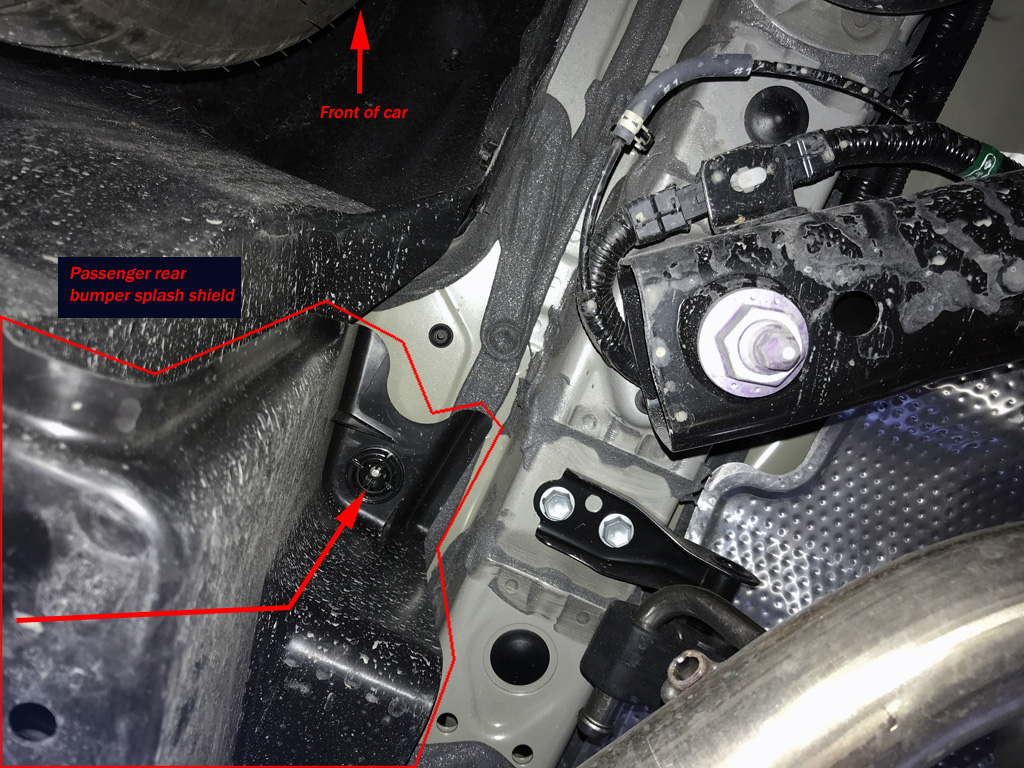
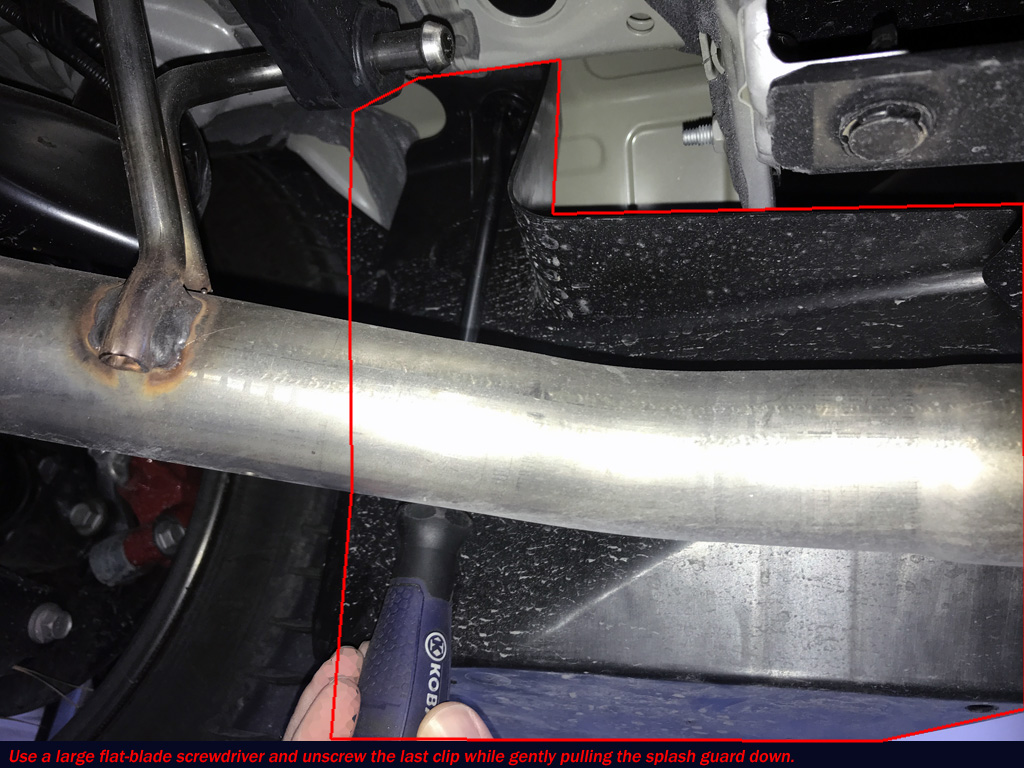
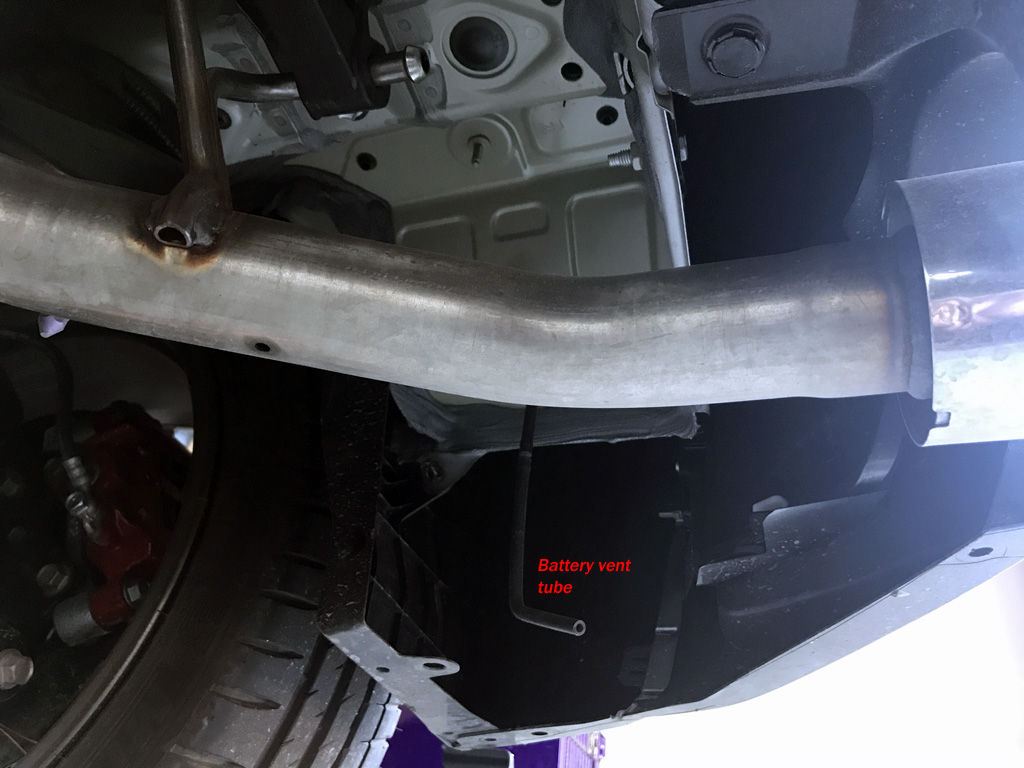
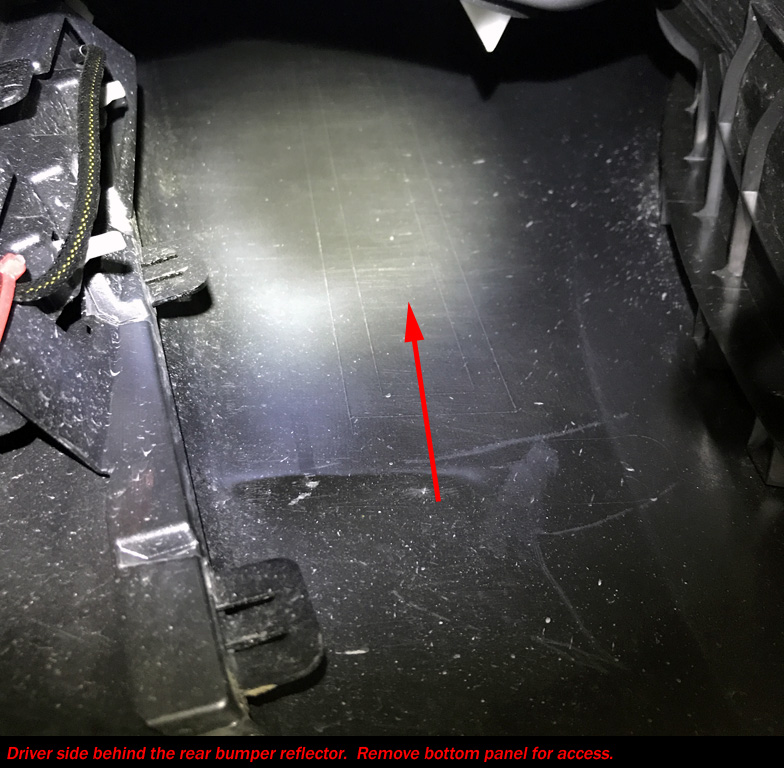
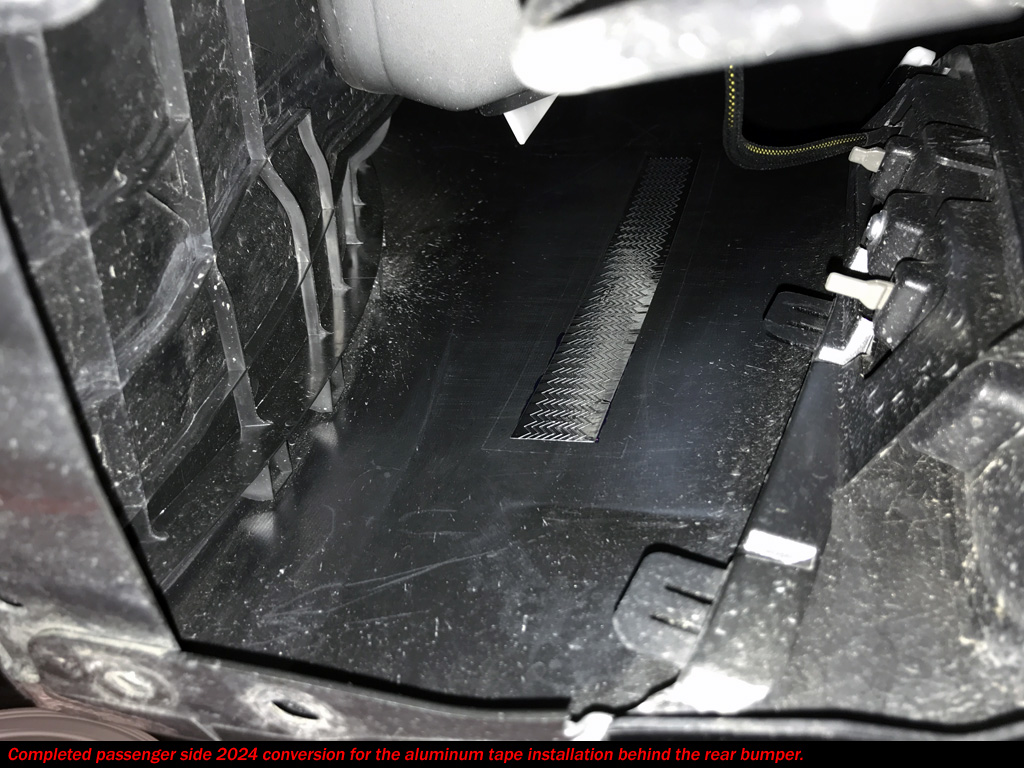
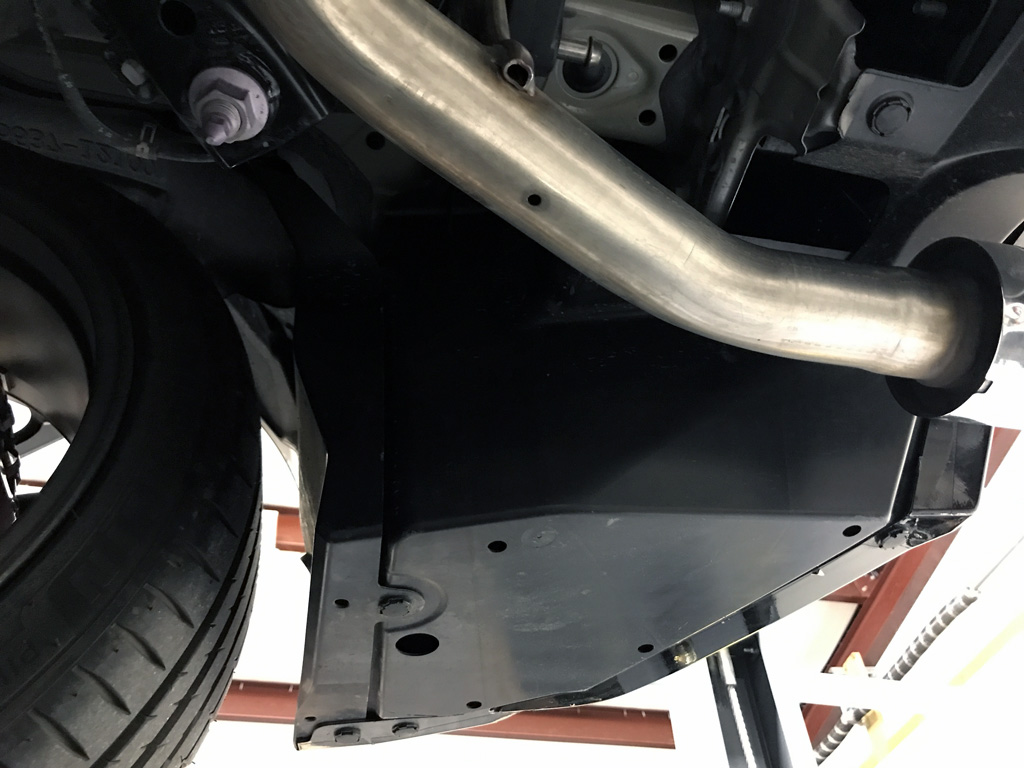
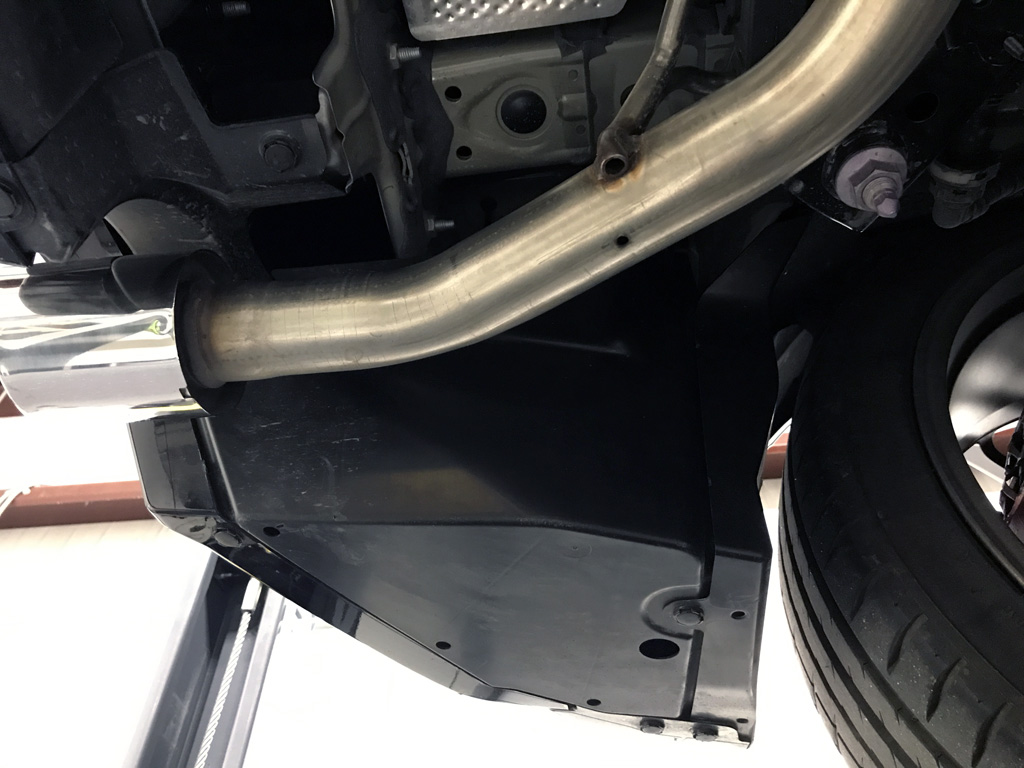
Lastly, Ken installs aluminum tape inside the front and rear bumpers. Fortunately for me, my 2023 GR Corolla was part of a rare group as both the front and rear bumpers came from the factory with a template for placing the tape. Very easy process of removing the bottom undertray side pieces both front and rear, then applying the tape from below. Due to the fender well ducting passing in front of the tape location
in the front bumper, I recommend installing the aluminum tape BEFORE the ducting.
Why the changes?
1. Internet chatter states Toyota found the Circuit Edition had front end lift issues that conflicted with the larger rear spoiler. Maybe the outlet duct changes to the fender well allow removal of the block-off plates, thereby reducing the front end lift?
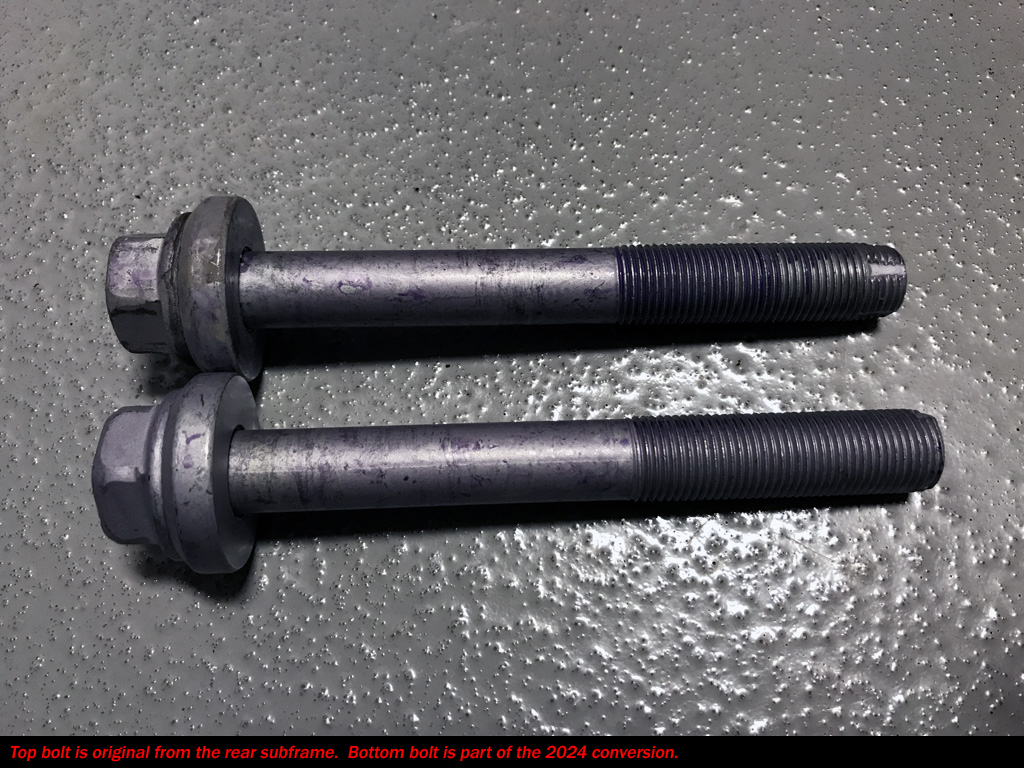
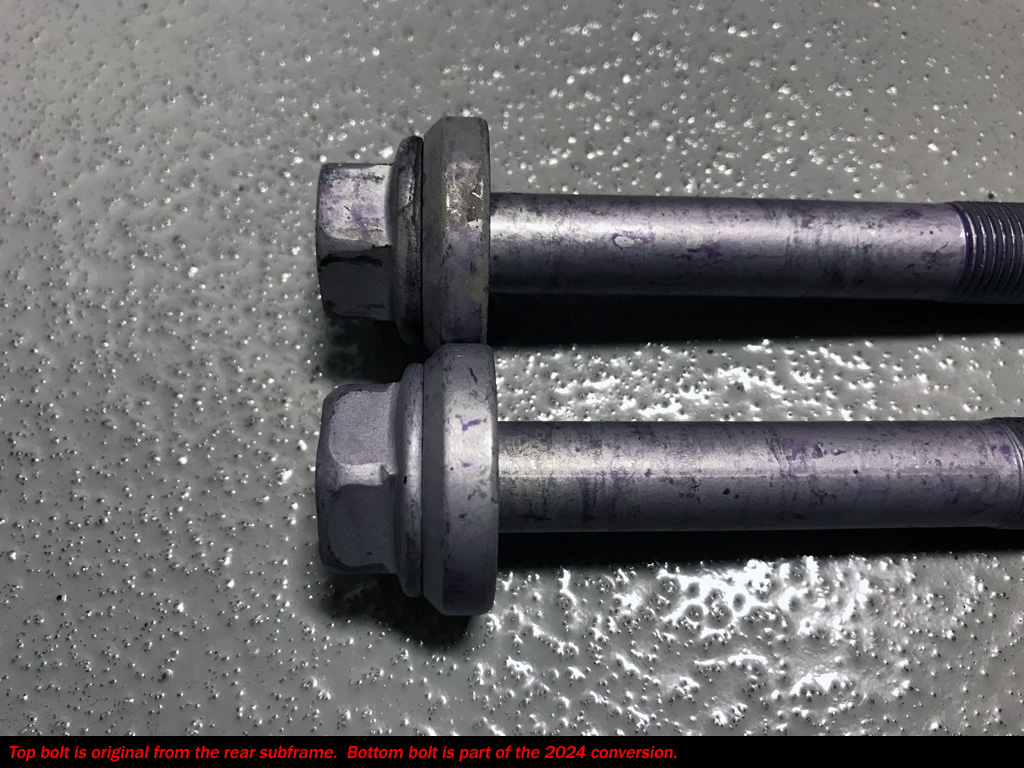
2. Rear subframe hardware could come down to lack of thread engagement on the original bolts. This is my hypothesis only.
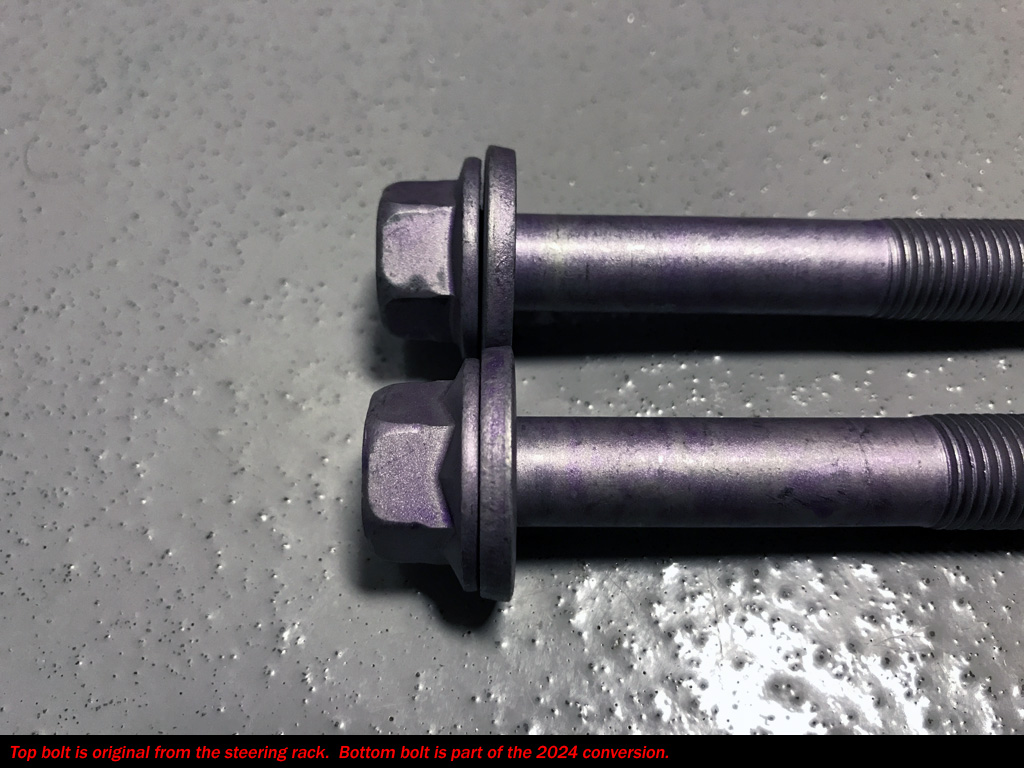
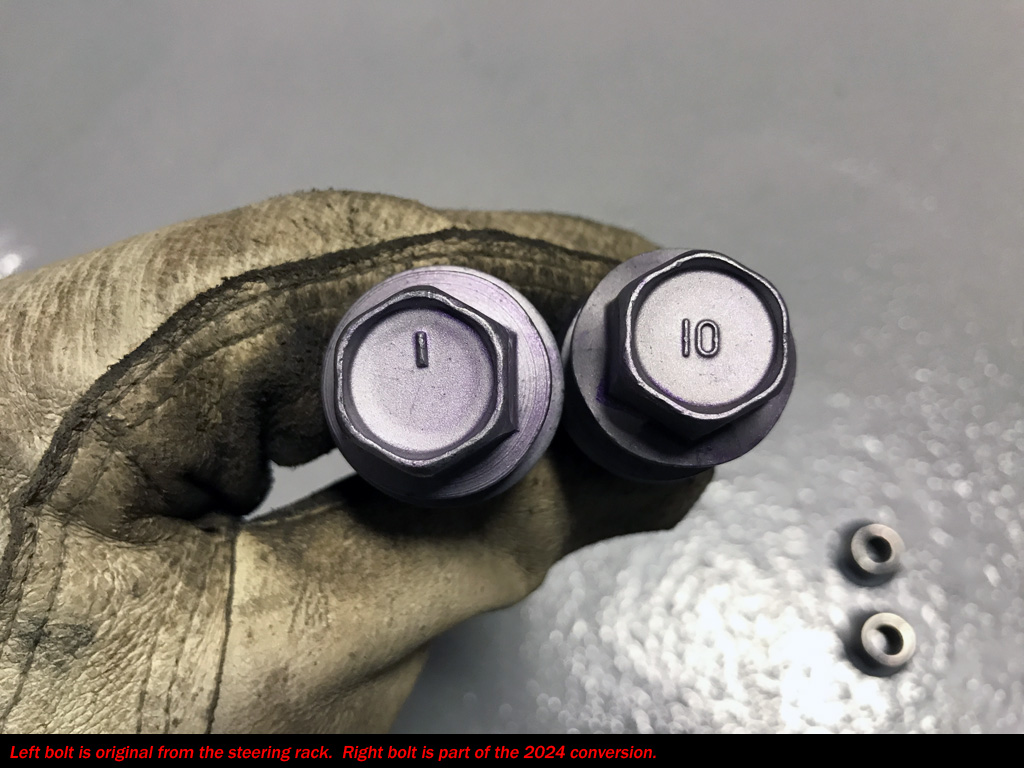
3. Steering rack bolts were called out to be torqued to 98 lb-ft per the repair manual. GR Corolla Forum user "st165" posted charts for various bolts from Toyota [-LINK-]. This user goes on to state the 6T class for M14 flanged bolt is specified to 90 lb-ft, but it was torqued to 98 lb-ft. Although there is a safety
margin built in with fasteners, Toyota decided to upgrade the (2) steering rack bolts to 10T. If a 6T, 14mm bolt is specified at 90 lb-ft, and a 10T, 12mm bolt is specified at 116 lb-ft, then a 10T, 14mm bolt should be specified 175-180 lb-ft by interpolation because the aforementioned charts do not contain that specific bolt.
4. Toyota actually has a patent on the aluminum tape technology. Supposedly, the vertical aluminum tape strips reduce static discharge and improve aerodynamics.
Date Completed:
02/04/24
Materials: (All from toyota.oempartsonline.com)
- Part #75895-53010 Bumper Cover Tape (Qty 4)
- Part #90119-14211 Bolt w/washer (Qty 2)
- Part #90119-16039 Bolt w/washer (Qty 2)
- Part #90177-A0017 Rack & Pinion Nut (Qty 2)
- Part #53864-12011 Duct Front Fender Air LH (Qty 1)
- Part #53863-12011 Duct Front Fender Air RH (Qty 1)
- Sharpie to mark front/rear bumpers for tape alignment (optional)
- Paint Pen (optional)

Tools:
- 1/4", 1/2" drive ratchets, a few extensions, sockets (10mm, 14mm, 19mm, 22mm, 24mm)
- 19mm combination wrench for steering rack nuts
- Small flat-head screwdriver to remove push pins from undertray
- Phillips screwdriver for front bumper inlet ducts
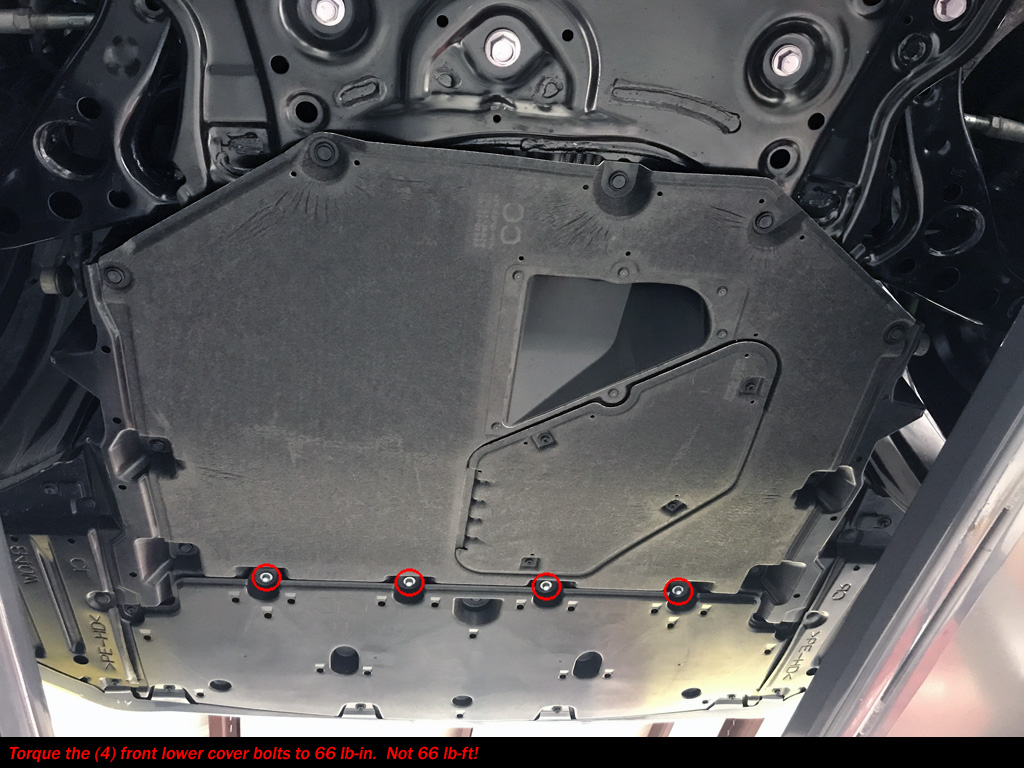
- 1/4" Torque wrench (66 in-lb)
- 3/8" Torque wrench (32 lb-ft, 35 lb-ft)
- 1/2" Torque wrench (65 lb-ft, 70 lb-ft, 98 lb-ft, 106 lb-ft)
- Breaker bar
- Headlight for work inside front/rear bumper (I have Coast brand from Amazon)
- 9,000 lb 4-post lift (optional, but highly recommended!)
*A friend for moral support is always optional.
Notes:
1. About 2 hour install. I took my time because of taking pictures for this website.
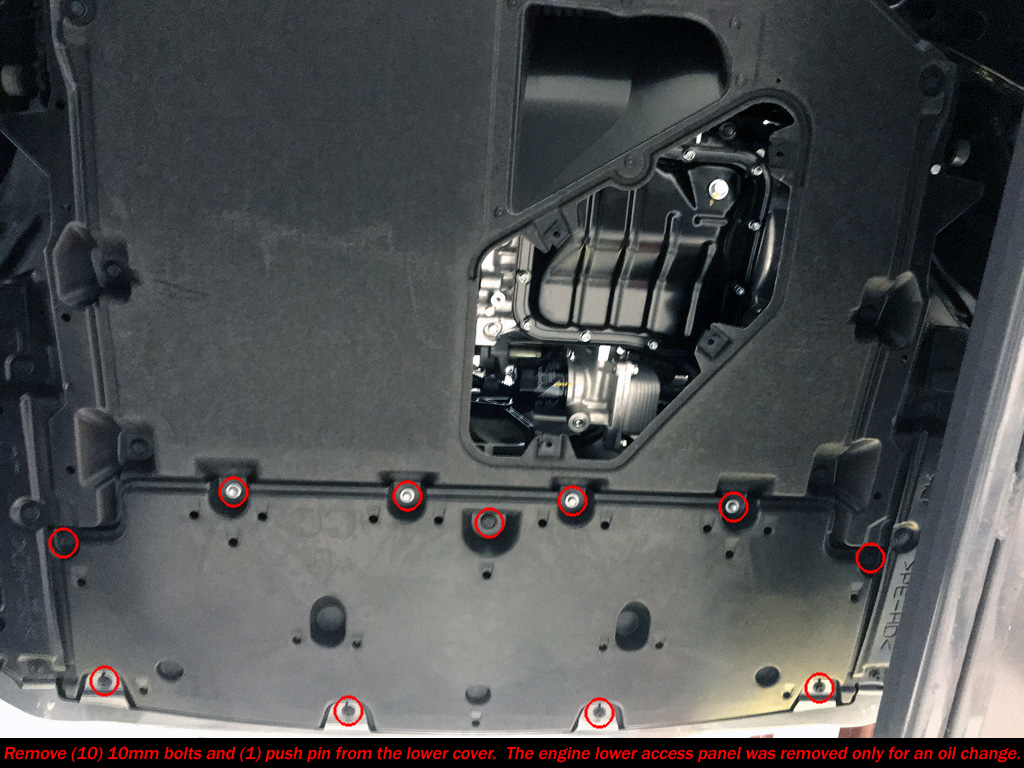
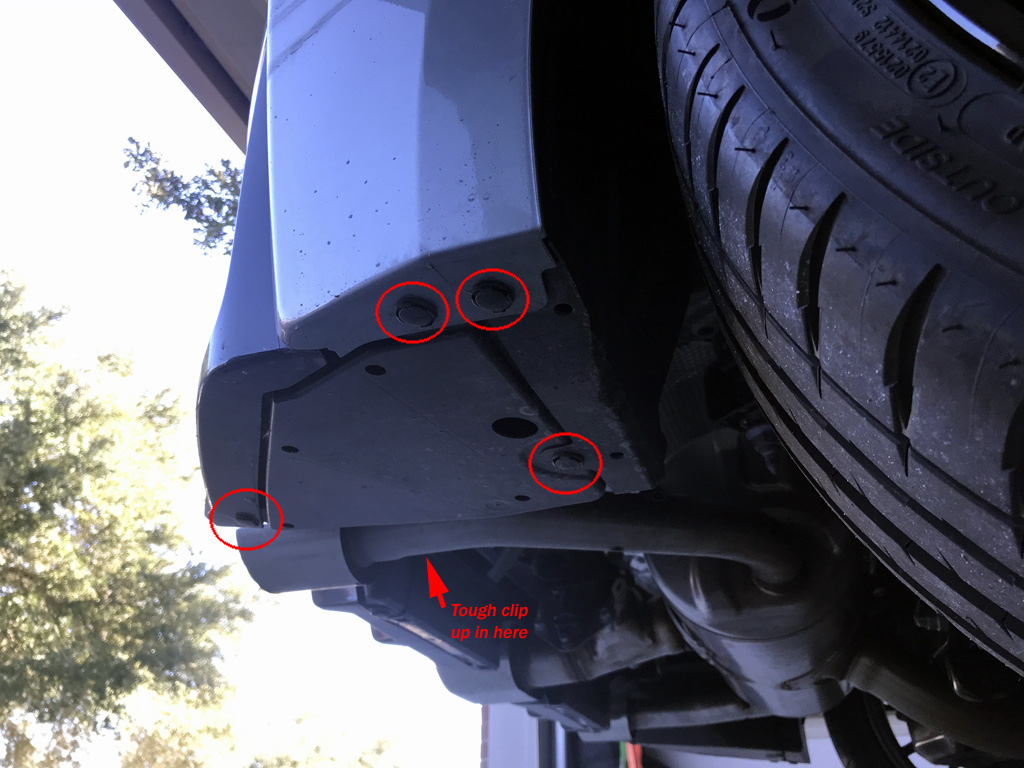
2. A total of (5) undertrays have to come off. Main front undertray, both front bumper side trays, and both rear bumper side trays.
3. Lay everything out as you go (old vs new). Bumper ducts are easy. Do one side at a time. Start all bolts by hand to prevent cross-threading.
4. The fit between each front bumper inlet to the fender well ducting to the outlet ducts is very loose. The ducting in between just slides back and forth.
5. No wiring plugs need to be disconnected for this swap.
6. I used a paint pen to mark all bolts/nuts to indicate if any preload is lost after torquing the fasteners.
7. Reversible back to stock.


|